
Authoring a book is awesome – especially when you’re done with it – but holding an actual object in your hands still gives a special kind of thrill. I’ve just run an ultra-small print batch of my Professional Photoshop Scripting book, that I have self-published with Leanpub and printed-on-demand with Lulu: in this post I’m going to describe the whole process, what I’ve learned from it, and what I’d do differently to make the result even better.
TL;DR
There is some room for improvement but all considered I am pleased!
Disclaimer
In my daytime job I also do some books designing for my client, when asked; I have a decent understanding of printing process’ technical aspects in general, and I am familiar with the related software. In a previous life of mine I’ve been a color-management consultant for press/pre-press too. Nonetheless, this whole “get the book printed!” business took me by surprise, and I wanted to go through it as swiftly as possible; as a consequence, I admit to have taken, sometimes, the quickest path (i.e., not the best one).
Why have I got a printed version of my book in the first place?
I didn’t want to; I mean, it wasn’t planned when I was writing it. Jeffrey Tranberry (Sr. Product Manager, Digital Imaging at Adobe Systems, and long time Scripting advocate) has very kindly accepted to write the book’s foreword: he’s gotten in touch with me a few weeks later asking if it was possible for him to receive a signed copy. Sure, I’d be glad to! Although it took me a moment to get accustomed to the idea that I, Davide, was the one supposed to sign a book for Jeff and not the other way around – in 2012 he wrote Power, Speed & Automation with Adobe Photoshop with Geoff Scott, the only other book on earth that touches PS Scripting.
The main problem was that I had no actual printed book to send, just a PDF. I felt morally obliged to fulfill Jeff’s fair request as soon as possible, so I started my research for an online, print-on-demand service.
Creating an ebook with Leanpub
My starting point was an ebook that I self published with Leanpub. If you’re not familiar with them, you are allowed to:
[…] write books in Markdown (our dialect is called Markua), Google Docs or our visual editor, and publish an ebook (in PDF, EPUB and MOBI) with one click. The Leanpub store helps you sell your book while it’s in-progress, getting reader feedback and earning 80% royalties. Or, upload a completed ebook to sell in our store.
I couldn’t recommend Leanpub more, seriously: as a company, they offer extra services that I don’t really need (book landing page, e-commerce, in-progress publishing, etc), but their writing platform alone is superb. I’ve already used Leanpub for my previous book Adobe Photoshop HTML Panels Development, hence I was no stranger to the whole process.
I took some R&D time to evaluate alternative options within my reach: I could use InDesign, iBooks Author, write in MarkDown and convert to PDF with Softcover or Pandoc1. After some pondering, I decided that they all required too much efforts on my side to customize the result compared to Leanpub design, which was excellent out-of-the-box; and so I went with it. The book in itself was already a tough enterprise to undertake, I’d be better off spending my time on content creation.
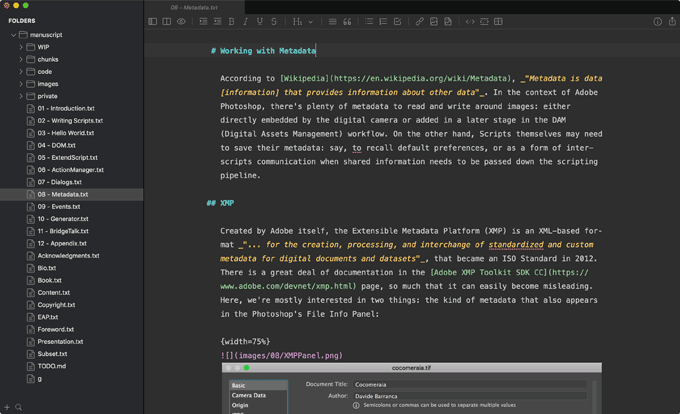
Writing in MarkDown
To briefly describe the process, I’ve written the entire book in MarkDown – a textual format with handy shortcuts, e.g., _italic_, **bold**, [^footnotes],  and everything else a writer may need –, keeping the files in synch with Leanpub via Dropbox2.
I’ve used Atom, MacDown and MWeb to write MarkDown, yet there’s plenty of apps (free or paid) available, even if to the best of my knowledge none of them supports the Leanpub’s flavour. In the last years they have been working on the specs of Markua, a MarkDown superset that specifically targets eBooks creation; it is already available as an option to authors, but besides Leanpub’s Markua online editor I don’t think there are apps for it.
You can trigger the book compilation on-demand, either the entire content or just an excerpt to make the task quicker; the compilation itself is performed on their servers and the results (PDF, ePub and MOBI files) uploaded to a shared Dropbox folder automatically. This is the main Leanpub’s downside, in my opinion: depending on the amount of content you’ve written, the PDF generation process can take few minutes to complete: besides the transformation from MarkDown to PDF3, you have to wait for the files to get uploaded to Dropbox, and downloaded locally. Alas, we’re not used to waiting anymore.
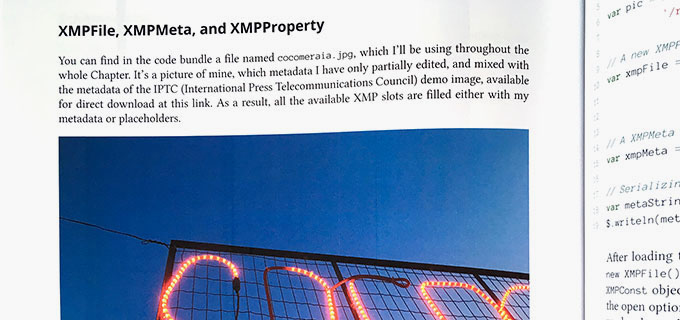
Speaking of the PDF, which is what you’d use for printing purposes, their book design has a classic and professional look, very well suited to technical publishing like my project.
Keep in mind that using a markup language also means that your content follows well defined formatting rules; while you focus on the writing, the book “composes itself”, so to speak. On the other side you don’t have pixel-perfect elements positioning as with, say, InDesign. Some trial and error is intrinsic to the process, but it inevitably extends the waiting time in-between PDF generations.
Exporting for print
Leanpub has a specific Export option called Print-Ready PDF, that is the one you should pick when your goal is ink on paper. It slightly differs from the traditional screen output, quoting from their website:
- It has no cover image. Services like KDP and Lulu want you to upload a wraparound cover, so our ebook cover image would be redundant. Instead, it starts with the inside cover.
- It has alternating page numbers, so that they end up on the outside corners. (The outside corners are the ones which are away from the book spine.)
- It has alternating margins: the inside margins are often wider than the outside margins, so that you can actually see the text on the inside margins. (The inside margins are the ones which are next to the book spine.)
- It has occasional blank pages to ensure that chapters start on the right side.
There is an alternative Export InDesign Files option that outputs InCopy .icml files, one per chapter: your job is to manually insert each chapter in a provided, dummy InDesign .indd file, which you can then customize to your book designer taste. Since I was in hurry, and Leanpub had a (now fixed) bug in the InDesign Export, I postulated that the Print-Ready PDF was a good enough starting point for me.
Choosing a print-on-demand service
My dear friend and Photoshop retoucher Daniele Di Stanio promptly pointed me to an article titled “My experiences printing a small batch of books”. The goal of the post’s author was to publish
“a simple, old-school book with… letters in it”
I.e., a novel. My book, instead, is in the technical publishing category (software development), with illustrations, screenshots, few photographs and a lot of syntax highlighted code. Our needs didn’t really match, but it was a well-thought comparison of Blurb, BookBaby, Lulu and Nook Press (now Barnes and Noble Press) anyway. For a while, I’ve evaluated local, Italy-based services as well, yet the price-tag was way too high; I also tried to understand how Kindle Direct Publishing works, but I couldn’t get whether the printed books must be sold via Amazon or could be directly shipped to the author, so I gave it up4. If you have experience of KDP, please let me know in the comments.
Each and every print-on-demand (POD) service provider offers some sort of “Make your book” page where you choose the book’s options, such as Size, Binding, Paper and Inks, etc. and gives you an estimate of the cost per copy. Depending on the print batch size, small discounts may apply as well. I suggest you to go through that process for all the PODs that you want to test, to understand which one better suits your needs and budget.
Printing with Lulu
At the end of the day, I decided to go with Lulu; probably other PODs could have worked fine too – after all I don’t have ultra-specific needs –, but one can’t keep splitting hairs in two for too long.
Book’s options
In Lulu’s Book Pricing Calculator page I could test how the various options affected the price per copy; besides a large variety of book sizes, the main choices were:
- Binding
- Hardcover Casewrap (traditional hardcover, stitched)
- “Perfect Bound” (milled/glued)
- Coil bound (with plastic coil)
- Inks
- Standard B/W
- Standard Color
- Premium B/W
- Premium Color
- Paper
- 60# Cream Uncoated
- 60# White Uncoated
- 80# White Coated
Few remarks.
Lulu’s Producs descriptions fall a bit short of tech specs: each option is related to the final result instead.
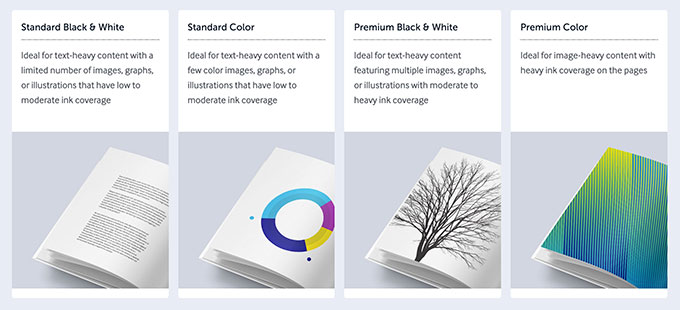
For instance, Standard Color is “Ideal for text-heavy content with a few color images, graphs, or illustrations that have low to moderate ink coverage” whereas Premium Color’s “Ideal for image-heavy content with heavy ink coverage on the pages”. I can understand this, but it tells nothing about the kind of inks used, print resolution, the Total Ink Coverage allowed, etc.
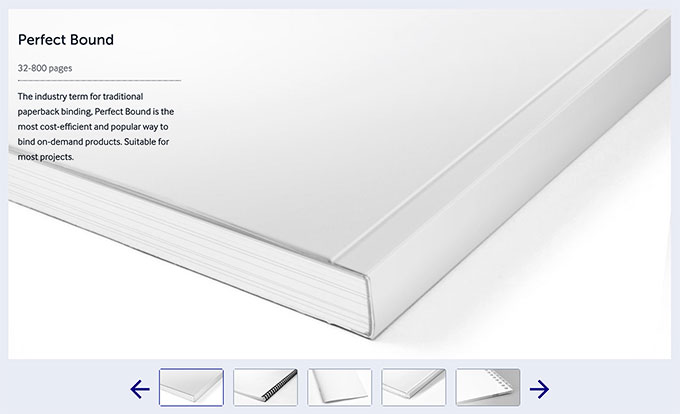
While Binding options are illustrated with photographs of the final object, no such close-up pictures are given for Paper types or Inks. I suppose 60# and 80# refers to the paper weight, in grams per square meter.

Given that my original PDF was US Letter (8.5x11 inches) sized, 400-ish pages long, this is the cost per copy for a variety of different Ink, Paper, Binding combinations:
| Ink | Paper | Binding | Price |
|---|---|---|---|
| Color Standard | 60# Uncoated White | Perfect Bound | $17.40 |
| Color Standard | 80# Coated White | Perfect Bound | $19.40 |
| B/W Standard | 80# Coated White | Perfect Bound | $9.80 |
| B/W Premium | 80# Coated White | Perfect Bound | $15.40 |
| B/W Premium | 80# Coated White | Casewrap | $22.75 |
| Color Premium | 80# Coated White | Perfect Bound | $65.40 |
| Color Premium | 80# Coated White | Perfect Bound | $65.40 |
| Color Premium | 80# Coated White | Casewrap | $72.50 |
My book is quite long, so keep that in mind when evaluating prices. Printing with Lulu goes from a nice $9.80 for a Black & White Standard Inks on the best paper with glued/milled binding, to a surprising $72.50 for the top quality options in all departments.
You can see that the paper choice doesn’t really influence the price that much, $2.00 spread over four hundred pages is half of a Cent difference per page, so 80# Coated White was a no brainer.
Inks make the greatest difference of all: +$5.60 to upgrade from B/W Standard to B/W Premium; +$4.00 from B/W Premium to Color Standard, and a whopping +$46 to get from Color Standard to Color Premium! I understand that the more expensive option is for Photo Books, which mine is not, out of question/budget. I was left deciding between B/W Premium and Color Standard: since I have several graphics in color, pictures and syntax highlighted code, I thought that it’d be cheap to print grayscale so I went with Color Standard Inks. Finger crossed for the “few color images, graphs, or illustrations that have low to moderate ink coverage”.
I should have picked Casewrap (the hardcover, stitched binding option), but +$7.10 looked too much for the cheapskate I’ve become in my forties, so I got Perfect Bound with a glossy finish.
My final price was around $20 per copy; I ordered the titanic amount of 3 copies, which added $23 in Ground Courier Shipment, 4/5 days to wait. With my country’s VAT, all this print-on-demand test of mine was worth something more than $90, or about $30 per copy in total.
Preparing the PDF
This section is going to be a bit technical: if you happen to read this post because you want to Lulu-print your own book and it’s not text only (e.g., a novel or poetry), try asking a graphic designer for help. Being subscribed to the Adobe Creative Cloud, I have access to software such as Acrobat DC, InDesign and Photoshop, that I’ve used extensively here.
Grab all Lulu’s relevant documentation PDFs from this page, and give it a read.
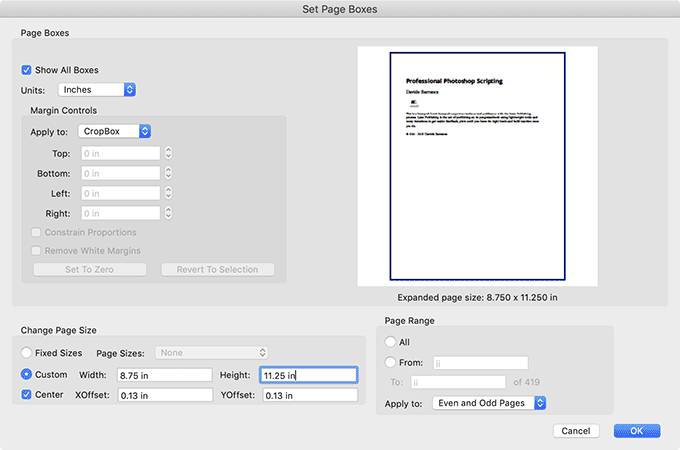
First, duplicate your Leanpub Print-Ready PDF. Open it in Acrobat and add the recommended bleed – in my case 0.125”; make sure you have a single page (not spreads) PDF with an even number of pages.
Speaking of Transparency Flattener, Lulu provides a Lulu-High-Res-Outlines.flst preset file: you can’t use it in Acrobat, only when exporting to PDF from InDesign. But from InDesign you can edit it to find out what the settings are.
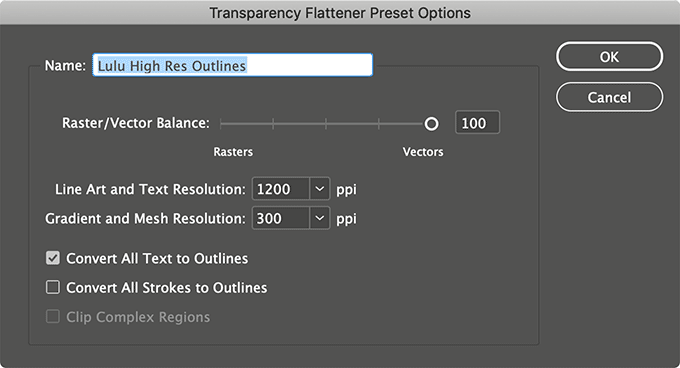
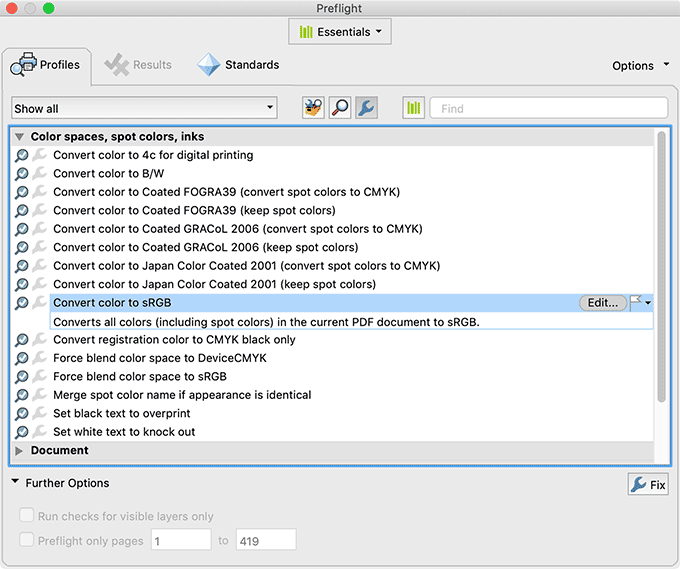
I am fine with everything but converting the text to outline, so I run the built-in Acrobat Transparency Flattener at high resolution:
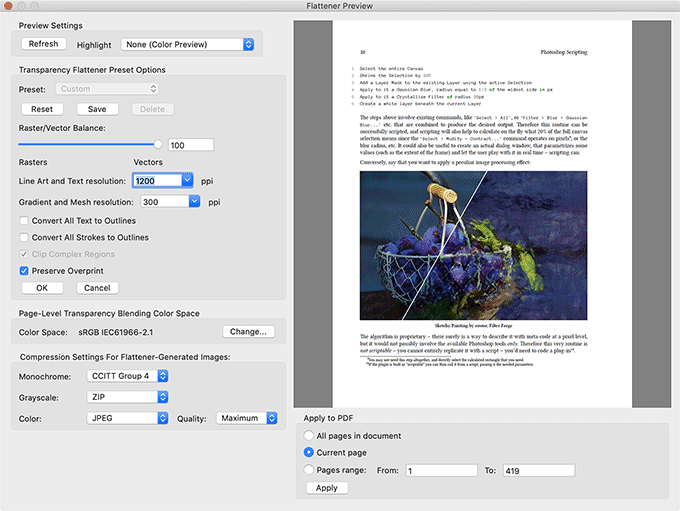
I’ve then run a preflight against PDF/X-1a, fixing the errors when possible. I’ve manually substituted images which were too low-res for the print version (but OK for screen/display visualization).
When it comes to Color Management, things are a bit fuzzy: Lulu provides two sets of JobOptions, here and here, with of instruction contrasting with each other, or with information that Lulu provides in the Guides. For instance, I’ve read to convert everything to sRGB, and Leave Color Unchanged at the same time.
I’ve asked in their forums, and they opened a support ticket for me. After a couple of very kind emails, I got this:
- They have ongoing partnerships with several print facilities in different places in the world (US, Canada, Europe, and Australia).
- They have agreed with each contractor on a set of quality standards (based on ink/paper), although their print partners are largely autonomous.
- They tend to suggest sRGB to standardize the color input (and avoid problems).
- It is not possible to micro-manage (prepress-style) graphic elements in the PDF (custom CMYK separations, GCR, etc) for each print shop may do CMYK repurposing on their own e.g., for color management or ink saving purposes.
This also explains why the product description is not very much detailed, but based on broad quality definitions. Reluctantly, I made sure that everything was converted to sRGB and did upload the PDF to Lulu’s servers – hoping that the pre-press gods wouldn’t notice my sin.
In case you’re wondering, I didn’t go on asking which print facility my order would have been sent to (somewhere in south UK, it turned out), with the idea of getting in touch with their prepress department.
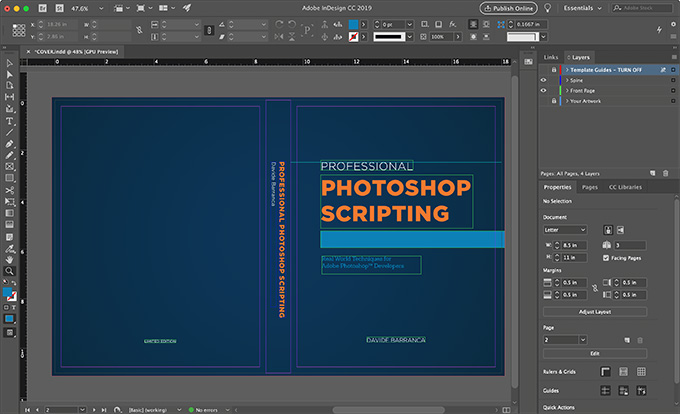
For the cover, Lulu provides an InDesign template and a Spine width calculator (based on the binding type and pages number) – creating the design from scratch wasn’t difficult.
The whole online order creation process is guided, and almost impossible to mess up when you have all the assets ready. I paid with PayPal, and the book got printed I think the next day, and arrived in my hands in a few days later as expected.
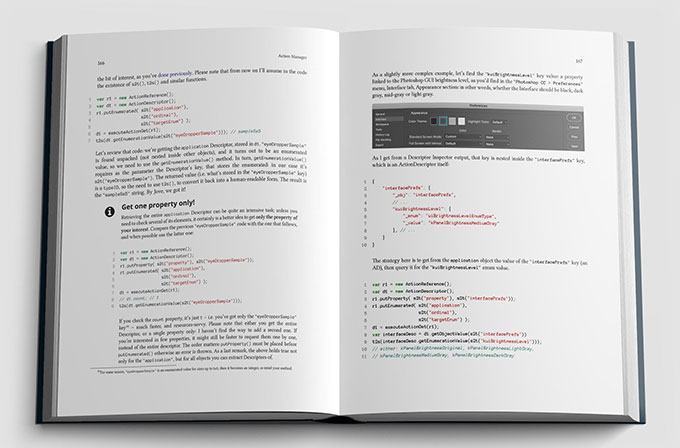
The printed result
It’s hard to be judgmental the very moment you hold for the first time a printed copy of the work that took 1.5 years of your life to complete: it looked awesome, and at the same time I was so fed up with the entire project that I gave it a quick review, wrote an affectionate dedication to Jeffrey, prepared the package and sent it to Adobe’s offices in Minnesota, US.
That said, you can read below a frank bullet-points list of what I liked, what I didn’t really like, what was my fault and what I’d do differently next time to get a better result.
The good parts
- The paper is nice: it looks very much like an 80g/mq, the coating is OK, it surely has some optical brighteners but it’s not obviously bluish/greenish.
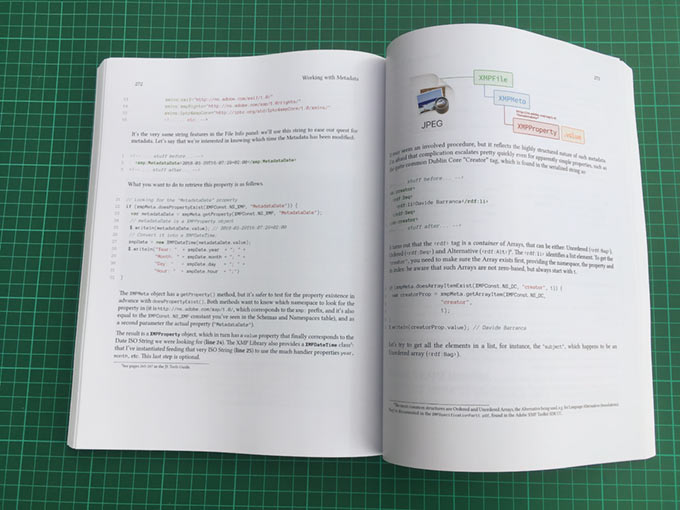
- The print quality is OK too. I was a bit worried about some pages with higher ink coverage, but in general there are no ghosting problems, stains and such. The color rendition and gray balance are fine too. Usually, software development books are printed in B/W, but given the limited batch I’ve ordered, it made little sense to save few bucks on B/W inks. Would I need a larger number of copies, I’d surely go for it. In case, it would be nice to have an 80 grams uncoated paper, but Lulu offers 60 only without coating.
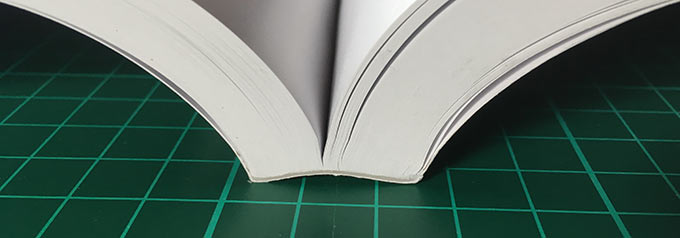
- The binding is robust, not the kind of book that looks like it will shred pages around the fifth time you open it.
The bad parts
Or at least the ones I personally find not up my expectations.
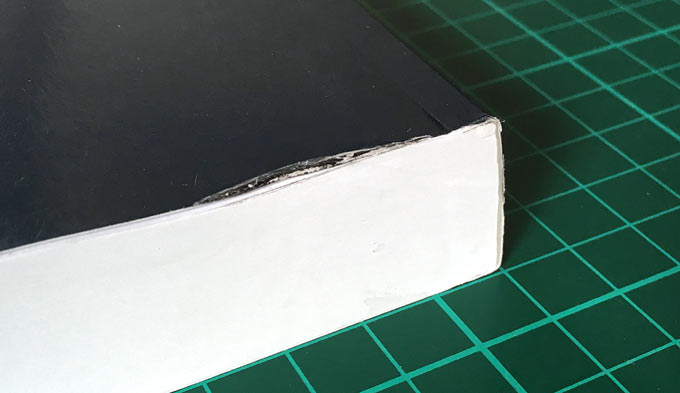
- The package wasn’t particularly good: the usual cardboard box with little protection against corners damage.
- The soft cover is rather fragile, especially along edges, where the glossy coat may get slightly peeled off. I’d be curious to see whether a matte finish is less delicate.
- Not being able to micro-manage the color separations still bugs me a bit.
- There is some banding here and there, that somehow I expected on a digital printed book. Probably the pricey “Color Premium inks” option deals with it.
My mistakes
- The book size I chose is too big to my taste. This is something I couldn’t change5: it would have meant re-checking all the elements flow, and I had no time for that. When you start writing your eBook, even if you don’t plan to print it, think about the physical size of the page: PDF area is one thing, paper surface is another. I went with US Letter (8.5x11 inches, 21.6x27.9cm): other books in the software development category are smaller, like 18x23.5cm (O’Reilly) or 1cm wider (Packt), so around 7-7.5x9.2 inches. Mine looks unnecessarily large.
- I didn’t check all the images resolution properly, so you can spot some pixelation here and there.
- Never, ever take dark interface programs’ screenshots. Dark interfaces are cool to use, eye-relaxing to look at, moderately nice in PDFs, dreadful in print, for legibility is compromised. My code’s syntax highlighting was great on the printed page, for it uses a light theme: don’t even think about using a dark theme for it. Also, I’m not 100% sure to have converted to sRGB all the screenshots when taking them6.
It’s not my mistake but it’s not clear either (I’ve to check with Leanpub on that) whether or not the Print-Ready PDF export option downsamples images. It may make sense for display PDFs, not so for Print where it is desirable to keep the max resolution available.
Conclusions
All in all, I am really pleased with the result. It took me some time to figure out the workflow for I was a first timer and I got some things wrong, but I can do better next time (even if I do not plan to offer my book in a printed version anytime soon). The materials are OK, the price is fair for a micro print batch such as mine. I’m curious to hear your experiences with print-on-demand services, so please share it in the comments section.
But I didn’t tell you the entire story…
Jeff offered me the possibility to send him two copies of my book: one as a well deserved gift to him, the other… would be sent me back with signatures by the Photoshop teams from both the Minnesota and California offices! Accidentally, “somebody” 🙏🏻 let also some tattoos, stickers, a pin and a shirt slip into the package, so I’ve now some Photoshop branded swag in the house, for my daughter to steal me7.

Isn’t that awesome?! ❤️
-
Pandoc is an open-source conversion tool that is also able to export to PDF from MarkDown, but the styling part is time consuming and you got to have quite some LaTeX knowledge. Softcover is a free alternative to Leanpub for the MarkDown to PDF part, but it requires more customization efforts, a bit of LaTeX skills and the resulting book style isn’t as good as Leanpub’s. Both have the notable upside that the entire process is local, whereas Leanpub creates the PDF server-side. ↩
-
The whole book was within a
gitrepository, with an optional hook so that each push triggered the book compilation. ↩ -
Leanpub conversion uses an intermediate LaTeX step, so it’s actually MarkDown to LaTeX to PDF. It is very likely that, internally, thay make use of Pandoc heavily tweaked with custom LaTeX styling. Which is what allows Text Blocks with Icons, Syntax Highlighting and all the features that make Leanpub ebooks so nice. ↩
-
It all may sound a bit sloppy now, but back then I really felt like I was in hurry: with more time, I could have evaluated options more carefully. ↩
-
Leanpub lets you pick a different page size when you export the Print-Ready PDF, but as I’ve written I had no time to check +400 pages again to look for, and fix, misplaced elements. ↩
-
On Mac, when you take a screenshot it is assigned the Display’s ICC profile. If you save the PNG/JPG with the embedded ICC, it gets properly converted to sRGB in the PDF post-production stage; if, by mistake, you discard the ICC profile while saving, sRGB is assigned (and therefore not converted) in the PDF, and colors will shift. ↩
-
She’s got a Magic Wand tattoo on her forearm that she wiggles around the house like Hermione Granger. ↩