I’ve been printing large format with an Epson 11880 for some years now, and I know when it’s time to get tough. That’s my take on “Ghetto Printer Head Deep Cleaning”
About in 2001 a friend of mine and I founded a company dedicated to fineart BW printing with Carbon based inks. We had first a Canon BJC-8500 with removable, disposable printheads (god bless Canon), then an Epson 7000 - both of them “converted” to BW inks (several shades of gray - stuff you don’t want to leave stains with on your hands and clothes). Fun times. I was in charge of all the technical stuff, from Photoshop to the printers.
Back then I learned how to hack printers and replace components - carbon inks were kind of harmful for printheads and printhead replacement quite expensive if done by an Epson technician. So I did manage to find a service manual and learned how to do it by myself. That is to say that I’m used to think about printers in terms of what they actually are (a psychotic crooked mix of tubes, electronics, etc) rather than a black box.
Problem
I’ve been printing with an Epson 11880 for about 7 years now and lately I’ve got this kind of issues, appearing randomly on the edge of rolls paper:
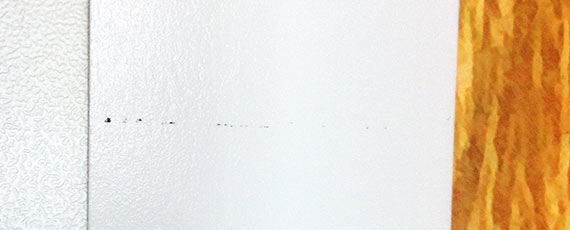
which is kind of annoying because that was a 64” x 84” exhibition print, and I hate acrylic retouching even though I’ve to do it (after all, chemical prints were retouched too). This problem got worse and we’ve had to trash few prints.
Diagnosis
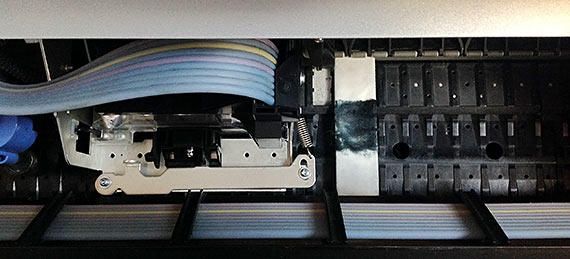
I had to inspect the print head: the ghetto way is to perform some kind of action - like a nozzle check - and brutally unplug the power cord. The head is then free to move back and forth (and not locked in the parking position) so if you release the paper lever you can look from above in the slit where paper is usually fed and see whether the print head has some kind of hair or dust or whatever that might touch the surface while printing.
 That was the case. Since I use Hahnemuhle rag based paper, the cutting process produces lots of powder, which accumulates in the printer and eventually can form some kind of mixture with ink and ambient dust.
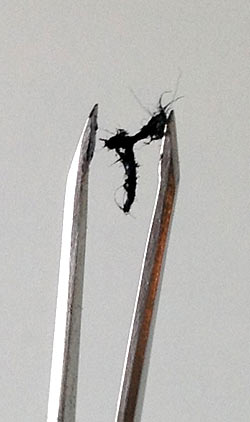
In particular, the head had a couple of sort of hairs, which bended when I moved the print head. It’s like what happens when you’re in a car that accelerates: you lean back, then the car slows down and you lean forward. When the print head changed direction at the roll’s edge, the “hairs” moved too and hit the paper leaving stains - you nasty hairs.
Solution
Head cleaning the hard way!
The toolset includes a metal ruler, some thin tissue (the less hairy, the better) and a cleaning liquid - both tissue and spray I’ve used were originally for LCD screens.
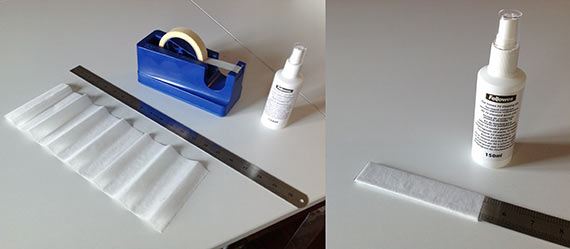
As you see, it’s a matter of wrapping the ruler with the tissue (make it quite soft, three rounds would go) using some tape to fix it, and spray generously your new tool with the cleaning liquid.
Next, while the printer is switched off and the head is free to move, insert the ruler as you would with a sheet of paper (see below) and move the print head over it one time - yes, I know, but it deserves it.
Remove the ruler (pay attention not to rub the inked tissue against the plastic wheels below) and repeat two or three times with a new tissue.

Actually I’ve had to make two tools like this one to use them as sort of a pair of pliers - in order to pick out some dirt that seemed to stick on the head border - neat trick that worked ;-) Further inspection on the head surface revealed no more dirt. Since I was in a “desperate houseprinter” mood I decided it was time for some spring cleaning, because there still was some dirt accumulating in there.
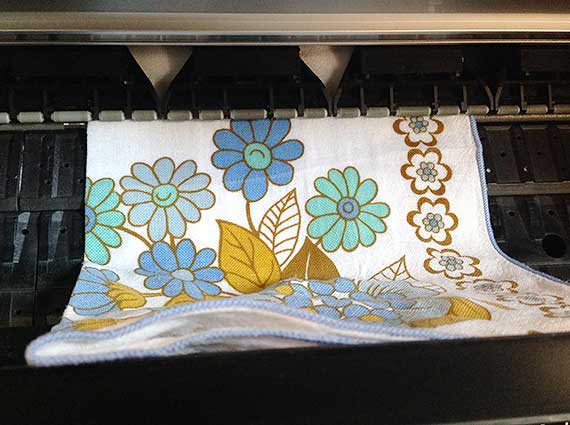
The gray rolls that keep the paper pressed on the platen are a good candidate for some washing too. Here it is how I did with a vintage floral tissue (and the same liquid, generously poured on it), rub it up and down.
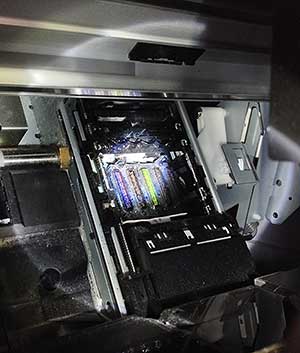
Next up, the parking area - which is where the print head parks when you shut it down and where the pump sucks the ink to clean the nozzles. That’s the why is one of the dirtiest place in the printer - I’ve inspected it with a torch and found a nice mess.
 With the usual clean tissue and liquid (and a pair of gloves) I’ve removed lots of rubbish - the kind of which you’ve see in the tweezers picture.
That’s basically it - of course when you’re done plug back the power cable and let the printer complain - the nozzle check will be a disaster but after a round or two of cleaning it’ll be ok again. I won’t recommend this kind of routine unless strictly necessary, but I’ve found that the Epson 11880 bears such a torture quite well and it’s a miracle cure when everything else fails!