PS Projects is a Photoshop CC / CS6 script that implements the idea of Project Files (a lightweight container of links to images on your disk, that you need to open frequently). This ‘User Manual’ post will go into every detail of it.</p>
If you haven’t seen them already, please go over this one minute presentation and read the companion Introducing PS Project blogpost to get a brief, visual overview about what the product is all about.
http://www.youtube.com/watch?v=5EYZNU6gAZw
You can get PS Projects from Adobe Exchange or Bigano e-store. In order to streamline the installation process, please make sure you have the latest version of Adobe Extension Manager (download here: CC, CS6). If you run into problems with the installation, ask for support: Exchange users can post here, Bigano customers will ask here.</span>
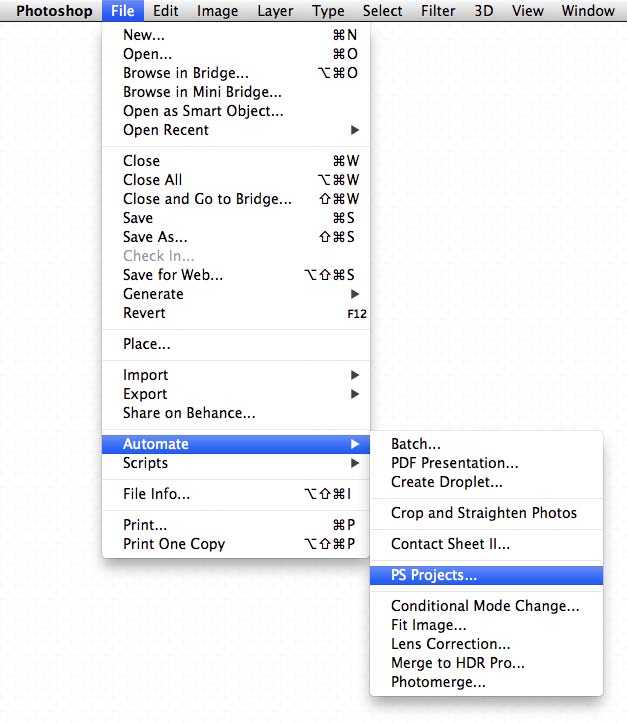
PS Projects belongs to the File – Automate menu ->
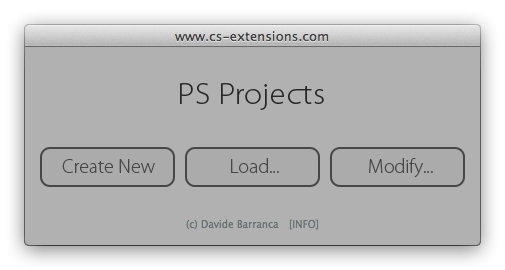
PS Projects has three modules that you can access from the Main Dialog, this User Manual will cover them all. Just below the buttons, the [INFO] link points to this very page.
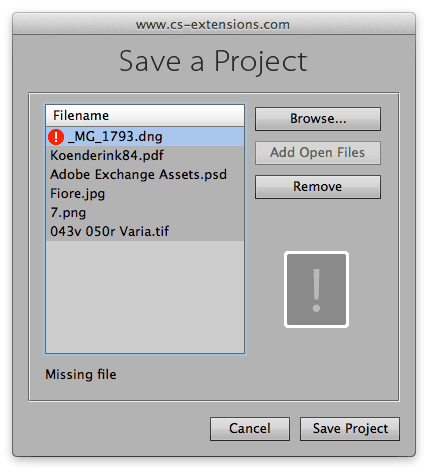
Clicking the Create New button opens the Save a Project dialog:
First click the Browse… button to run the Photoshop “Open dialog” and choose images from your hard disks. You can include in a PS Project all formats Photoshop is able to deal with (PSD, TIFF, JPG, DNG… etc.).
If you happen to have files already open in Photoshop, provided that they have been saved at least once (and they haven’t been modified afterwards), you can include them with the Add Open Files button – which is grayed out in the screenshot above since there are no open files at all.
The Remove button does what you guess – it removes from the list all the selected files.
When you click the Save button, you’ll be prompted with the usual dialog: choose a meaningful name (without extension: the script will add .psproject automatically) and save the file wherever you like.
As soon as the save dialog is closed, an alert will ask you if you’re willing to immediately open the images of the Project file just saved or not.
Select Load… to locate an existing .psproject file on your disk. All the images that are referenced in the Project will be opened in Photoshop.
In case the Project contains missing images (say you’ve moved, or deleted them from the disk after saving the Project) an alert will log all the lost entries.
The Modify… button is a combination of the other two. You’ve first to select an existing .psproject file; then a dialog identical to the Create New one will appear, automatically filled in with the list of images referenced in the Project file you’ve just loaded.
In case of missing images you’ll get both a warning pop-up and a red icon besides the filenames, showing an exclamation mark thumbnail.
PS Projects runs on Photoshop CC and CS6, on both Mac and Windows.
Introduction
Installation
Where is it?
Main Dialog
Create New
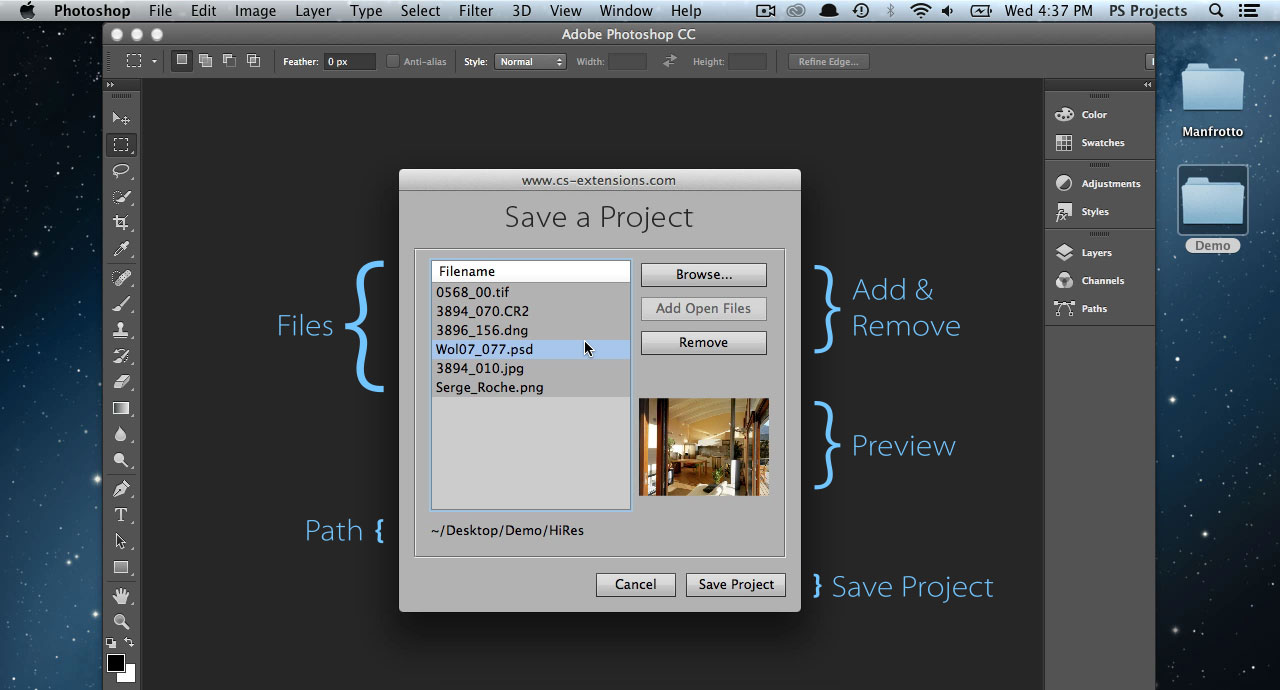
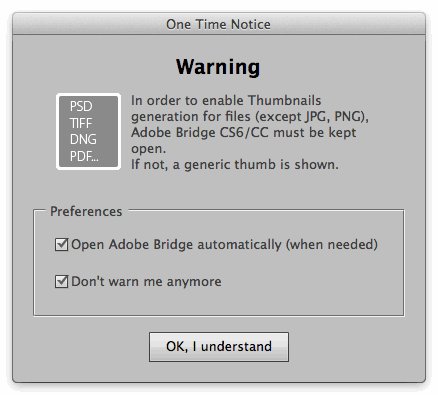 The Files list shows filenames of the included assets. You can click on them (multiple selection allowed): the Path will appear below and you’ll get a Preview thumbnail. File formats other than JPG and PNG require an instance of Adobe Bridge open to display the preview – the same way MiniBridge requires his bigger brother to work properly. No problem if you haven’t it or don’t want to run it – these preferences can be set (the window at left pops up the first time) and you’ll get a generic thumbnail as the preview.
Load…
Modify…
Requirements
0 Results