In the previous post I’ve approached appealing yet wrong solutions to the problem of splitting in a scriptable-friendly way Dark and Light halos of the Unsharp Mask filter (USM) using Smart Objects (SO). I’ve got to use Smart Filters (SF), which parameters can be easily modified anytime. To find a working answer to the problem (which is just a pretext for going into the topic of sharpening and blending modes), let’s go back to the basic of Halo Maps creation.
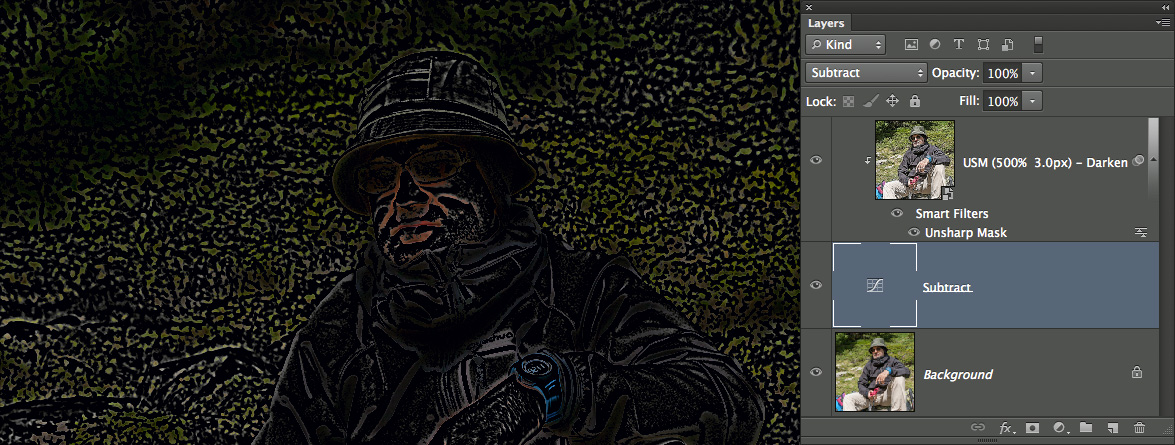
If you’ve followed the first post of the series, this is what a Halo Map for USM Dark halos look like:

My friend Santo is back – here with his peculiar Dark Halos map (USM 500%, 3px) coming from a Grayscale version
As a reminder, it’s been created fading to Darken the USM applied to a duplicate of the original, then subtracting the original layer from it. The appropriate Blending Mode to simulate USM is Linear Burn. How would you get there with SO, avoiding Calculations? Let’s split the problem into smaller pieces.
Fade to Darken / Lighten
Duplicate the Original layer, call it “USM – Darken“, then apply USM as a SF. We’ve a couple of options here, either:
- fade the SF in Darken
- fade the SF in Luminosity and set the SO to Darken
Pick up the one you like the most (I prefer the latter, that avoids chromatic shifts and it’s a nice way). Nothing new so far.
Subtract
Photoshop doesn’t allow you to stack blending modes – that is, you can’t set a layer to Overlay, then set the composite result to Luminosity, then set the composite result to Darken. Something you would write:
Darken( Luminosity( Overlay (layer) ) )
A trick that doesn’t work (it would be really nice if it would) is to use nested Layer Sets (aka Groups), changing the blending modes of each one. No luck, try yourself if you will. Why do I want such a “double” blending? Because I’d like to use Subtract on a SO that already has its own blending mode. A neat solution is to use Adjustment Layers as a support – for instance if you want to Subtract to layers:
- Put the two layers one on top of the other in the Layers palette
- Create a Curves Adjustment Layer (or Levels, it’s just the same) right in between. Leave it as it is.
- Set it to Subtraction blending mode
- Clip the upper layer to it
Pretty nice – the only limitation is that you can’t stack more than two blending modes (it would be a really cool feature if Photoshop supported nested, multiple clipping! But it doesn’t). Actually, I’m performing a triple blending (SF faded to Luminosity, SO set to Luminosity, clipped to Subtraction) but this is cheating because a SF is involved ;-).
So, we’ve subtracted the faded-to-Luminosity, Darken USM and the original layer, let’s go ahead.
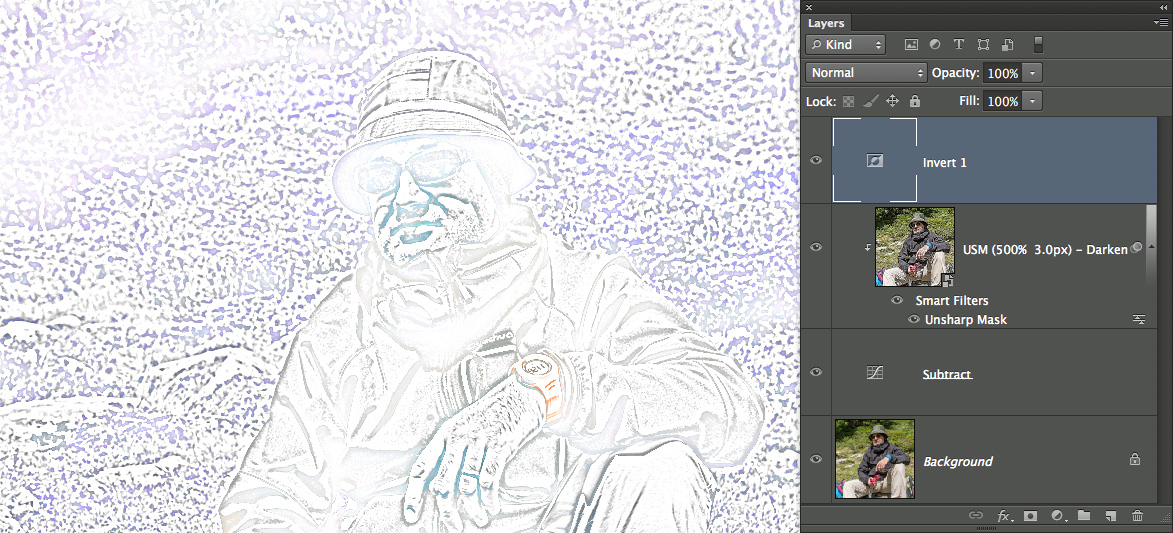
Invert
The Halo Map is almost done, we need to Invert it – and an Adjustment Layer will come handy. Almost done!
Linear Burn
How would you set all that to Linear Burn as requested? Think about it: we already have a bunch of interacting Blending modes. The solution lies in the use of Layer Sets, with a caveat.
If you just group the Subtract Curve, the clipped SO and the Invert Adjustment Layer you’ll see that no matter what group’s Blending mode you set, the result doesn’t change. In order for a Layer Set to effectively use its content for blending, it must have a bitmap base: that is, it can’t be based only upon an Adjustment Layer with clipped stuff on, it plus extra adjustments on top. To make it work, duplicate the Original layer and put it inside the Layer Set, so that you end up with the following setup:
Top-down:
-
Linear Burn Layer Set, containing…
-
Invert Adjustment Layer
- SO, set to Darken, with a USM SF faded to Luminosity – clipped to…
- Curves Adjustment Layer set to Subtract
- a duplicate of the original layer
-
Invert Adjustment Layer
- the Original, unsharpened layer
Does this make sense to you? Within this setup, you can change the USM Dark Amount/Radius on the fly, tweaking the SF (double click on it and change the values)
Halfway!
We’re just in the middle of the task – we still need to create the Light Halos Map. It should be easy now, though! (I’m lying of course ;-)) One thing that you should keep in mind when trying to replicate this setup on your own before reading along, is that you don’t just need to fade to Lighten (instead of Darken).
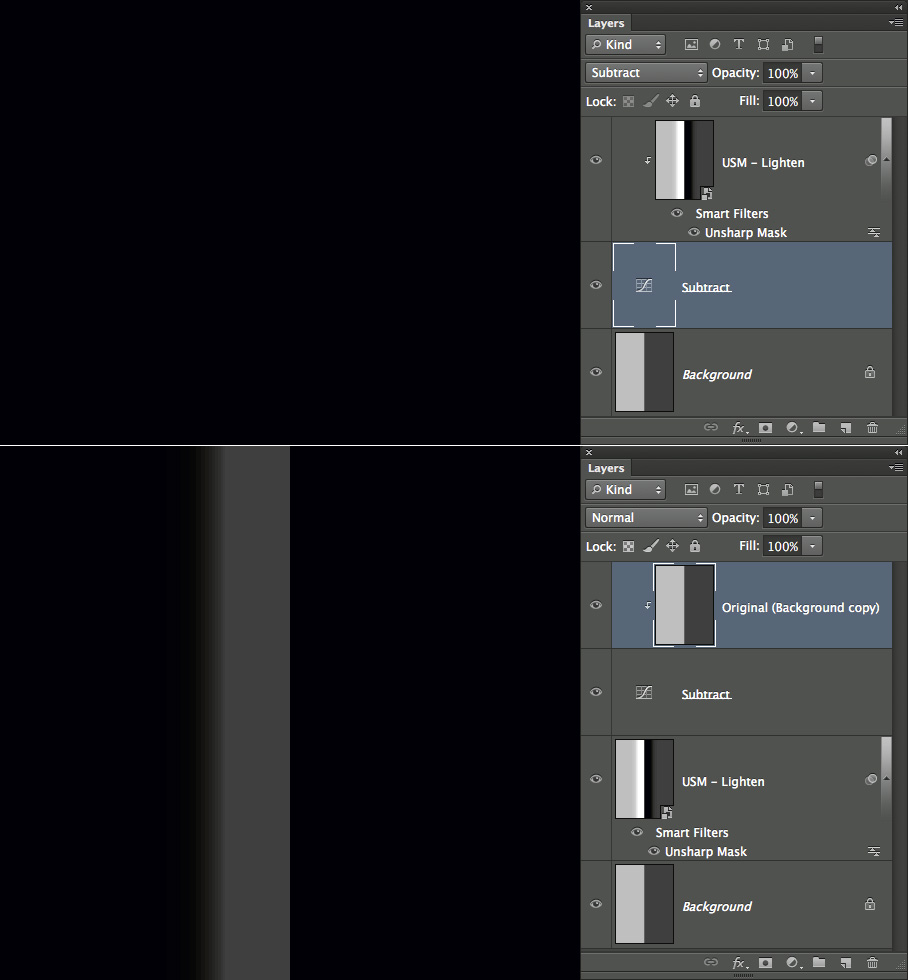
Think about how Subtraction works, say you’ve a Base layer and a Blend one on top, set to (wonder what) Subtraction. The actual operation carried along is:
Base – Blend
and not the reverse. If you go back to a simpler grayscale image, you’ll see that in order to extract the Light Halos the position of the layers in the subtraction must change, otherwise you’ll get a totally black layer:
Eventually, your final setup will look like as follows:
Phew. We made it! This is a working configuration that let you split Dark and Light Halos of USM in a non-destructive, updatable way (my script is based on this one), at least for RGB and CMYK documents.
Yes, because in the Lab colorspace, it doesn’t work at all (why? Try yourself and find this out if you don’t imagine the why). Lab requires a completely different approach, that I will explore in the next post of the series.
The Decomposing Sharpening series has been written as a research project for my script DoubleUSM: multi-radius sharpening. You might be interested also in Fixel Detailizer 2PS: multi-frequency contrast booster.


