If you’ve followed this series, you know that I’m involved in a scripting project for Photoshop that deals with sharpening, splitting Dark and Light Halos control. So far, I’ve been able to build Layer Sets that mix Smart Objects (SO), Smart Filters (SF) and several Blending modes with good results – at least if I restrict myself to RGB and CMYK documents.
Because when you approach Lab with that very workflow in mind, you hit a notable wall. That is to say, Subtract blending mode is not allowed: no Subtraction, no party.
In the Lab colorspace, Blending modes act in peculiar ways (some would say: arbitrary). For instance, if you set a layer to Multiply, only the L channel is actually multiplied, while a and b behave as in Overlay. Why? Go figure. For the same reason (that’s my own personal opinion) Difference, Exclusion, Subtract, Divide, not to mention Darken and Color Burn, Lighten and Color Dodge are grayed out.
One option when you feel stuck in a dead end is to ask for help to friends – better if they’re talented, with a solid scientific background, Photoshop experts and coding wizards. Most of the following content is here because of Jacob Rus‘ kind suggestions and comments. Luckily he also knows how to support the afflicted
[Davide] I’ve found out that my biggest efforts have been spent dealing with unexpected behaviors
[Jacob] This is called “programming” 😉
So: a different plan is needed, back to the basics.
Work around Subtraction
If you recall post #1 of the series, when I’ve introduced the concept of the Halo Map I’ve briefly cited High Pass as one of the ways to extract detail up to a certain frequency threshold into a separate layer. High Pass is deeply linked to Gaussian Blur, being nothing but a Subtraction between the original image and a blurred one (with Offset 128).
You’ve read at least one interesting word: subtraction – yes, we’ll be using High Pass to workaround the Subtraction lack as a blending mode in Lab. To refine the correct setup let’s switch to grayscale for a quick review of the concepts I’ve shown throughout the past posts of the series.
Unsharp Mask uses Gaussian Blur
Indeed.
High Pass is made with Gaussian Blur
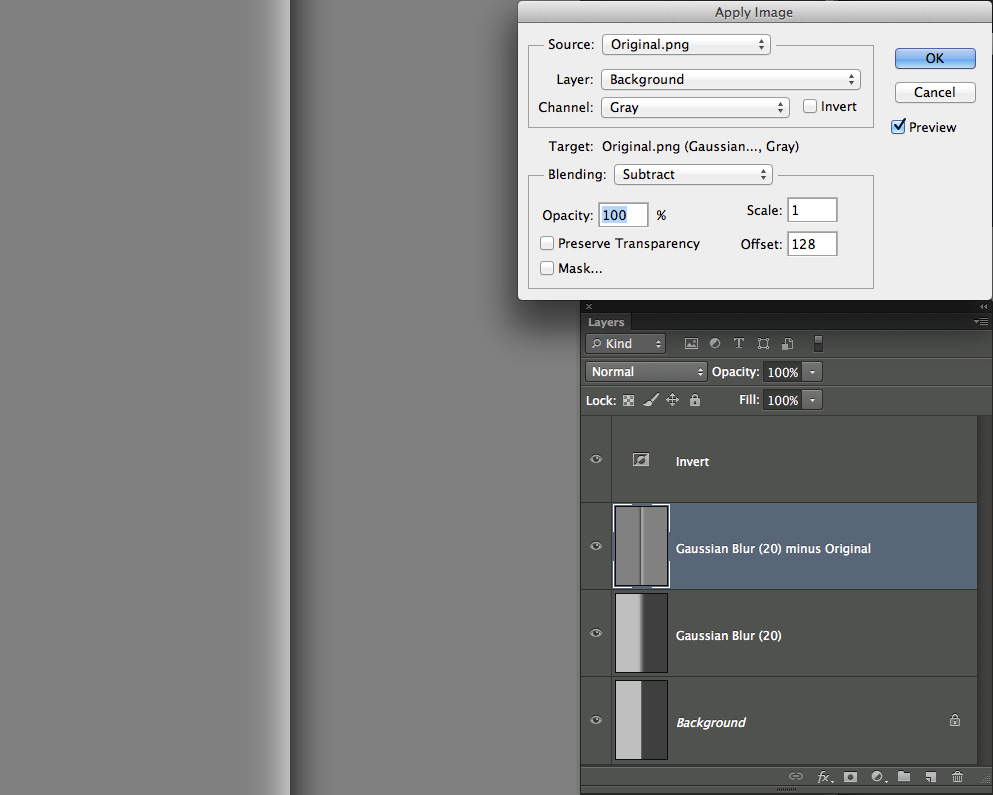
That is, High Pass = Original – Blurred. You can get there in several ways, using Calculations, Blending modes or (as in the following screenshot) with Apply Image – I’ve applied the Original in Subtract, Offset 128 on a Gaussian Blurred layer.
So Unsharp Mask can use High Pass
Which is not a very big news, but few have ever shown the exact setup that replicate USM precisely – and of course I’m going to do it here with SO and SF, splitting Dark and Light Halos.
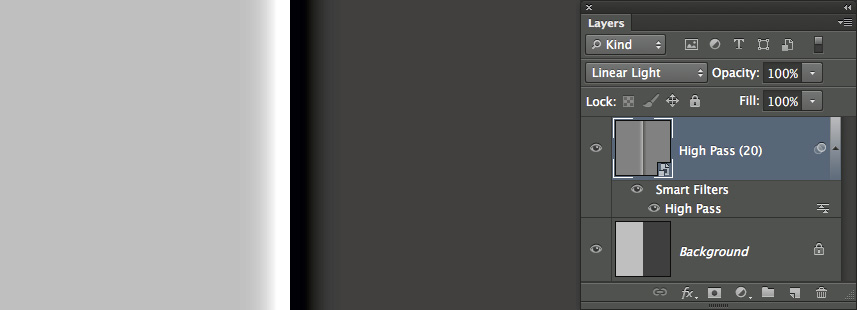
Using Linear Light makes the High Pass layer look like USM:
Question: how much USM is this? Besides the fact that Radius is equal to 20px (the same as the High Pass filter), what about the Amount? Let’s have a look to Linear Light blending mode:
[Linear Light] if (Base > ½) = Base + 2*(Blend-½)
[Linear Light] if (Base < ½) = Base + 2*Blend – 1
That is to say:
[Linear Light] = Base + 2*Blend – 1
In other words, as Jacob’s suggested me, “Linear Light mode just (if you define the midpoint of any channel to be zero) adds twice the top layer to the bottom layer“. Which should suggest that the above Amount for the High Pass sharpening is equal to 200%.
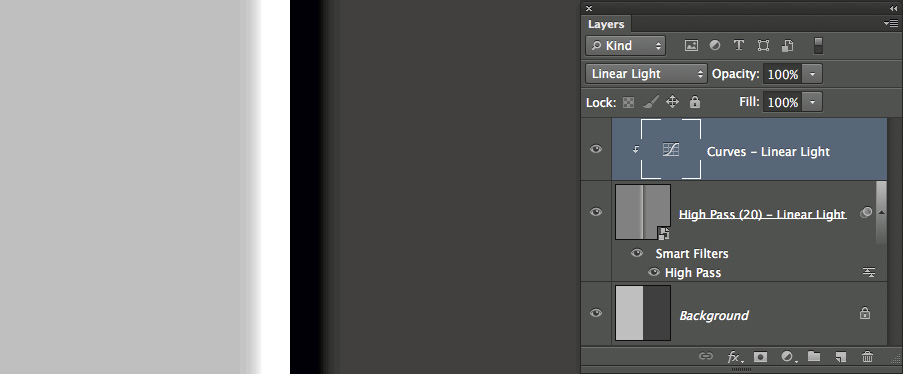
How would you modulate the High Pass layer in order to get to 500%? A neat trick is to use Adjustment Layers in a similar way as we’ve been doing to stack blending modes, this time clipping a blank Curves layer (Linear Light too) on top of the High Pass. It will act as a blending multiplier (mind you: not Multiply as the blending mode, but like a Linear Light booster):
The following formula regulates the interaction between the two Linear Light layers:
Amount % = 2*Base + 4*Booster
Where Base and Booster are the layer opacites of High Pass and Curves respectively. In other words the above screenshot shows a USM of Radius 20px and Amount 600% (2*100 + 4*100, pretty cool). Amount 500% requires 75% Booster opacity, Amount 300% requires 25% opacity and so on.
Splitting Halos
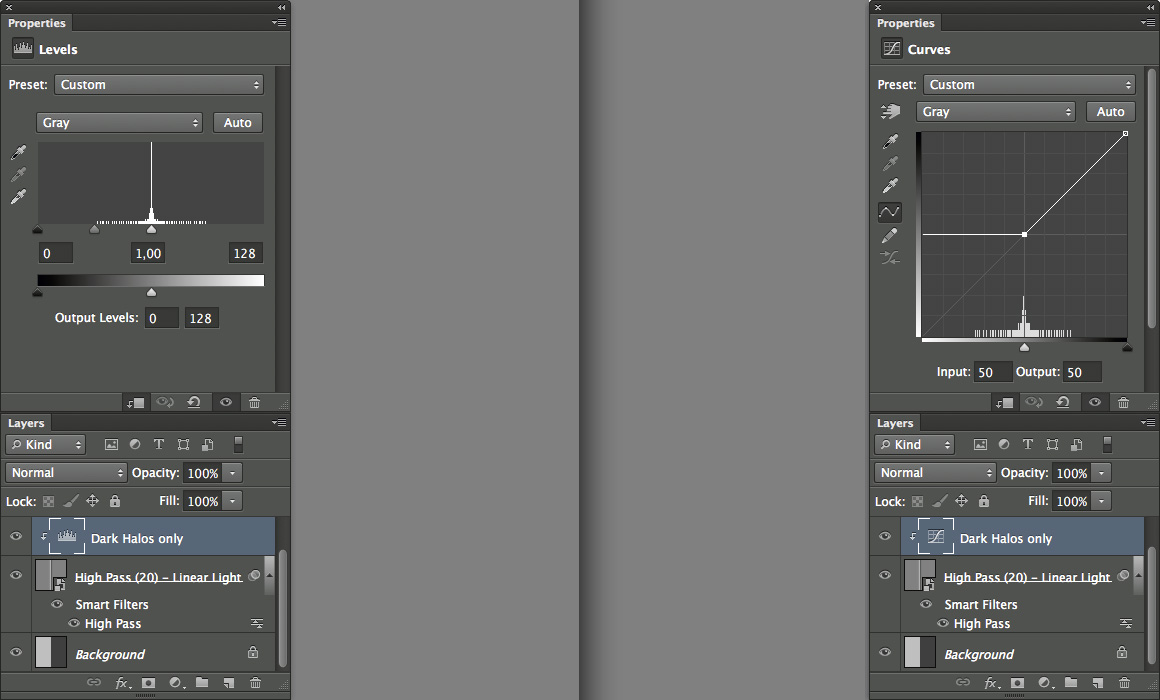
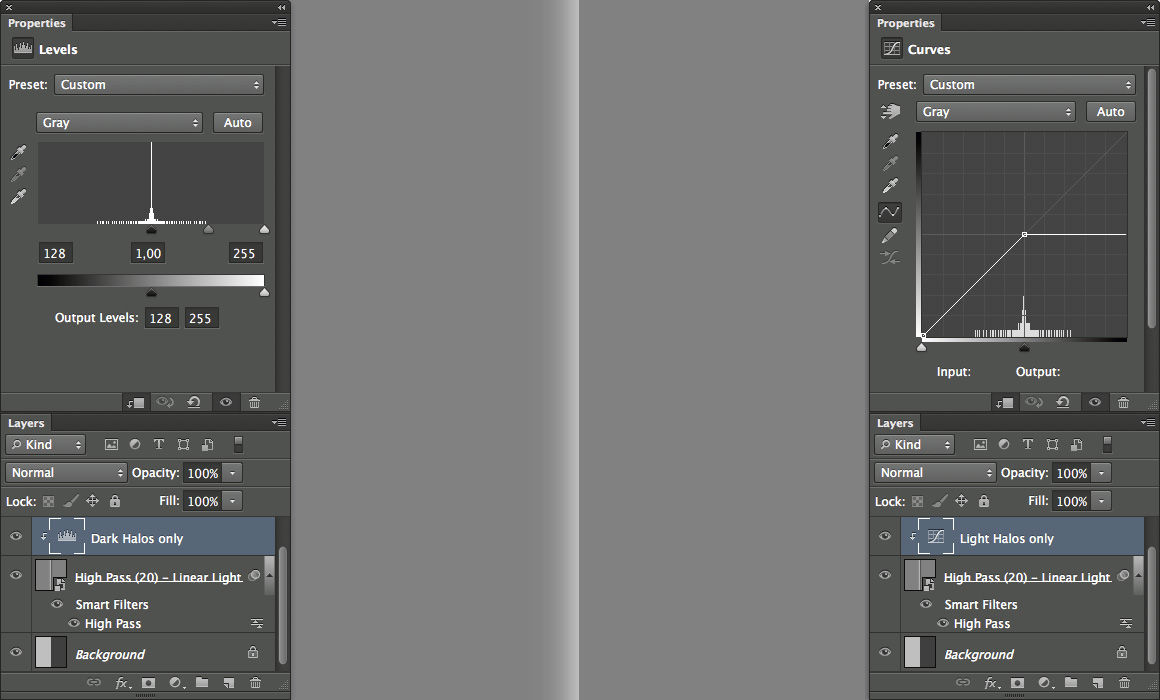
The business of splitting Dark and Light sides of USM here is pretty simple: you just need a way to obliterate darker-than-Gray 50% or lighter-than-Gray 50% shades from the High Pass layer. Which you can do with Curves or Layers adjustment layers, as follows the two options for Dark Halos:
And the same two options for Light Halos:
Is there anything missing?
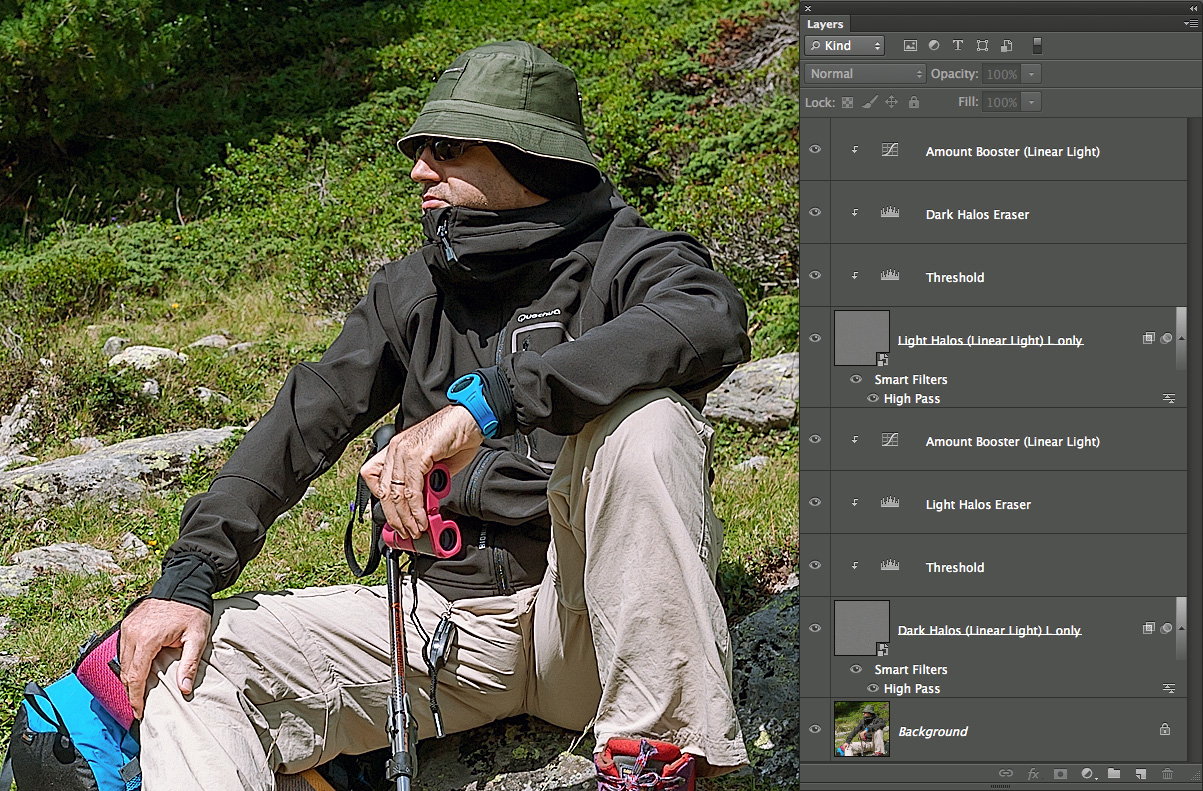
Of course there is, namely the third (often less crucial) parameter: Threshold. In order to implement it, I’m going to leave this gray flatland and switch to color mountains – where my friend Santo shows his brand new trekking outfit (it was pretty cold in the Alps that day in spite of the sun – our wives may confirm). Let’s merge everything I’ve shown so far (SO, SF, High Pass, split halos, etc):
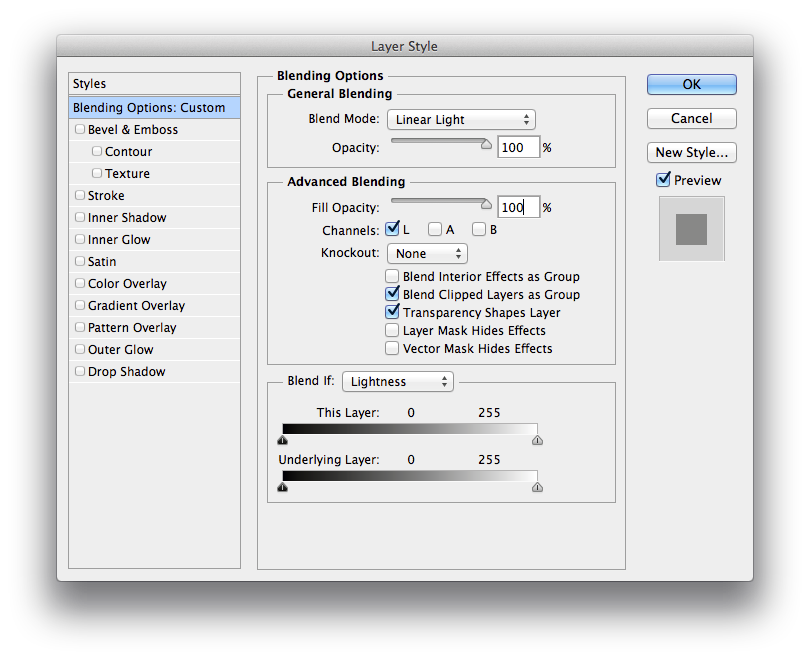
Since we’re in Lab, Linear Light will act wildly on chromatic channels (a, b) too, so you’d be better switching them off in the two High Pass SO Advanced Blending dialog (right click the SO name and choose Blending Options):
Threshold rolls in as a new Layers adjustment layer, right above the two High Pass SO. You can use Curves as well, but I prefer Levels because by default they come ranged 0-255 like the actual Threshold is (by the way, while the Amount is expressed in percent, Radius in pixels, Threshold’s units are Levels, which is quite the case here).
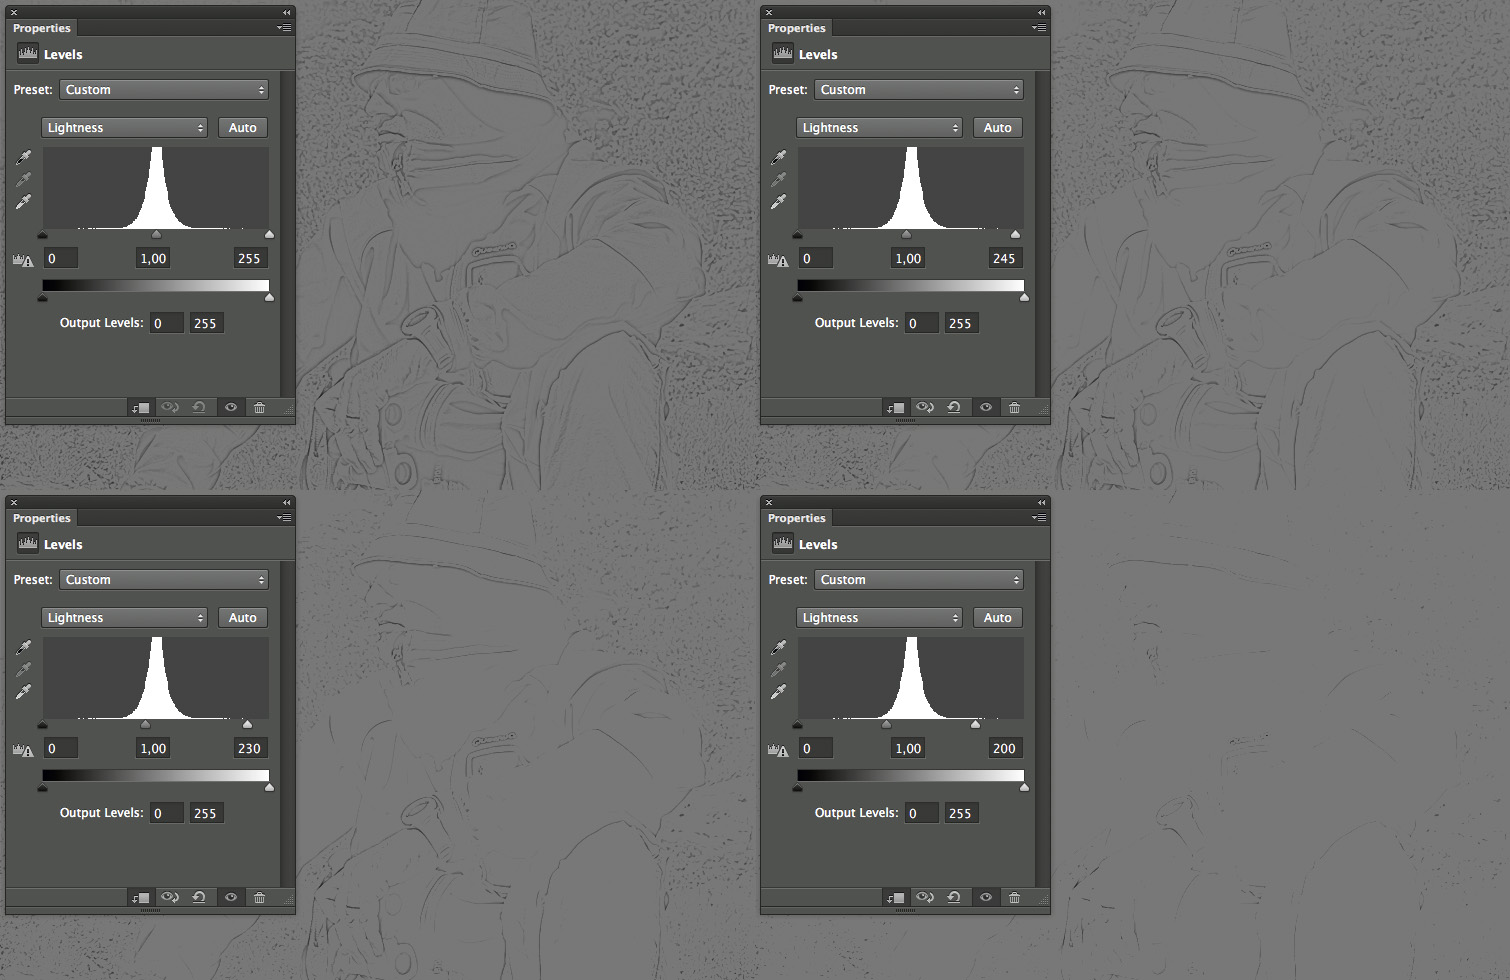
In order to nicely visualize how Threshold affects the USM, switch off one side of the Halos (say, the Light Halos High Pass SO) and keep only the Background layer, the Dark Halos High Pass SO and its clipped friends on top. Switch the SO blending mode back to Normal. You should be looking at a gray, high pass stuff with dark halos on it.
Click on the Threshold named Layers adjustment and start to move the white Input cursor to the left (the value starts from 255 and lowers). You’ll see how the dark halos in the High Pass layer are slowly eroded by the threshold – that is, only strong darker halos resist, while the rest goes to 50% Gray – this is another way to look at what happens inside USM.
You’ll move the White cursor left in the Dark Halos Threshold, the Black cursor right in the Light Halos Threshold Layers adjustment.
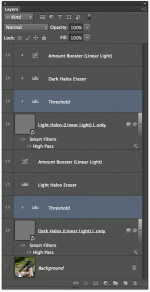
The final setup for Lab colorspace is eventually as follows:
This is the end of our journey decomposing the Unsharp Mask filter: it is something I do because I like it! I’m at work on a Photoshop script (on this very topic); yet I hope that to break the toy, look in its belly and put together the pieces in new ways have been an interesting learning experience for you – as it’s been for me as well writing about it.
A last, fifth post will follow (and definitely conclude the series) with notes, errata, variations, additions and what else, goodies perhaps. Thanks for having followed so far, you’ve earned the right to feel like a Sharpening geek now! 😉
The Decomposing Sharpening series has been written as a research project for my script DoubleUSM: multi-radius sharpening. You might be interested also in Fixel Detailizer 2PS: multi-frequency contrast booster.

