In the previous post I cited a tool for Photoshop I’m working on – which is currently on its beta cycle, thanks to the people of Colortheory. Basically, it’s a Photoshop script that lets you control separately both Amount and Radius for Unsharp Mask filter’s Dark and Light halos: that is, you can apply USM 500% and 1.5px for Dark Halos and 300%, 0.9px for Light ones, tweaking sliders on a single GUI.
Being it a Script and not a Filter means that I have to drive Photoshop behind the scenes while you play with the interface (I don’t have pixel access, it would require a programming knowledge exceeding my skills). In other words I must find a way to replicate with layers and filters that very effect; not only, the scheme update must be easy, because I can’t afford the whole processing to be time consuming (otherwise the live-update performance of the tool would degrade).
That is to say: I won’t follow the steps outlined in the post #1 of the series – producing two halo maps via Calculations, which would require a new calculation each time the user changes a single value. I need on-the-fly updatable parameters – I’m afraid I need Smart Objects (SO). I’m not particularly fond of SO – yet they provide Smart Filters (SF) which fit perfectly my requirements: SF are Filters applied non-permanently to a SO, i.e. you can decide to change their parameters anytime, or switch them on/off.
Given this framework, how would you deal with SO and SF to split USM dark and light halos? There are at least two easy and intuitive ways that may came to your Photoshop-driven mind (they came to mine, too) – yet they’re wrong; this post is just about this – how not to be fooled by appealing, easy paths.
Blending modes: Darken / Lighten
Let me use this exciting picture as an example:

Reminder: to convert a layer in a Smart Object, right click on the layer’s name in the Layers palette and choose Convert to Smart Object. Be aware that if you right click on the layer’s icon the option does not show (there must be good reasons that I miss for that). Alternatively, via menu: Layer – Smart Objects – Convert to Smart Object.
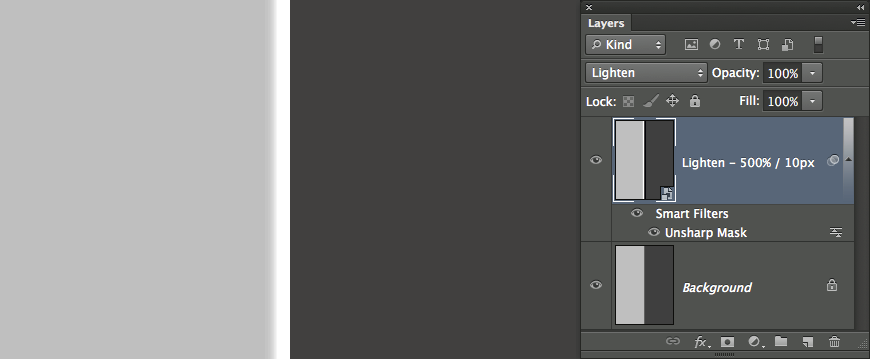
That said, if you duplicate the Background layer, convert it to SO, apply the Unsharp Mask Filter (USM, say 500% 10px, we’ll always leave Threshold untouched) and set the SO blending mode to Lighten, this is what you get:
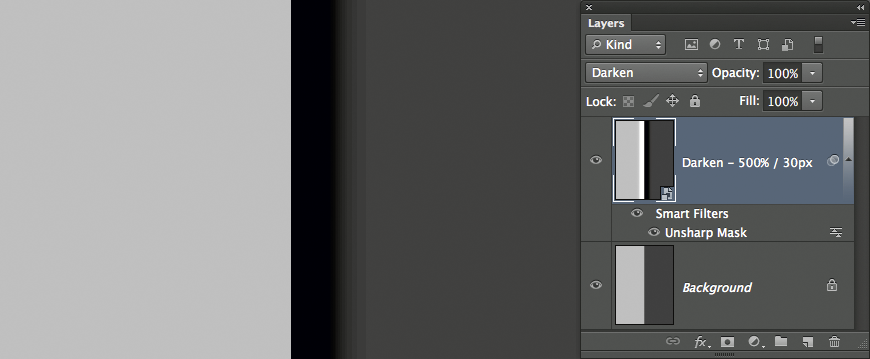
Same concept but a different USM (500%, 30px) blended in Darken:
So what would we get if we mix the two?
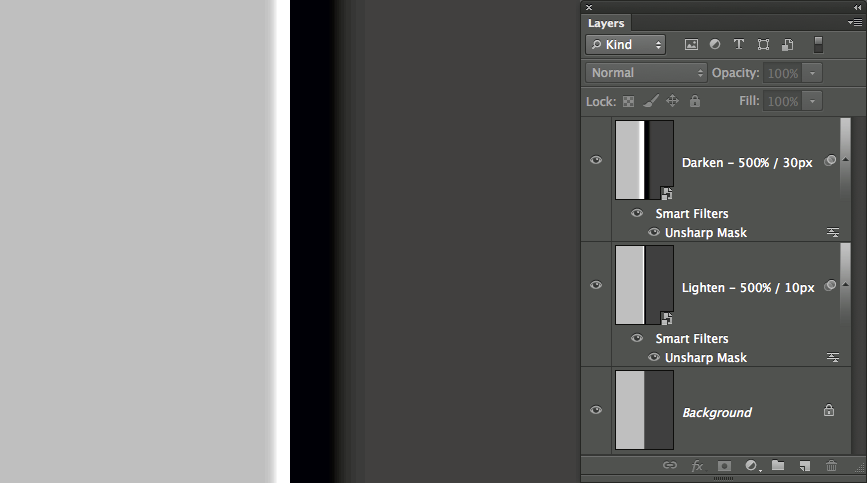
Exactly what you would have expected – that’s it, we’re done splitting dark and light halos. With a caveat: what if we reverse the layer’s order (Lighten top, Darken bottom)?

Uhm, it doesn’t work anymore. So the trick is to keep the SO with the bigger USM Radius on top of the other – easy peasy.
Alas, I should have been more careful, because I’ve based a good deal of coding time on this paradigm (two SO in Darken / Lighten) just to discover that it is flawed. What a unhappy business! Not to mention what my wife has been repeating me (she used to work as a programmer): “Did you test it? You did it not enough. Test it more or you’ll waste your time later. Don’t complain, I told you this before: test it!” She’s been in charge of testing, as you may guess.
But… why it doesn’t work? The example I’ve showed is misleading because as a test it is not exhaustive one: I’ve changed one parameter only – the Radius, keeping the Amount full blast at 500% What happens for instance if I lower back the Amount of Dark halos to 100%? No matter how I would set the layers order, the result does not match my expectations:
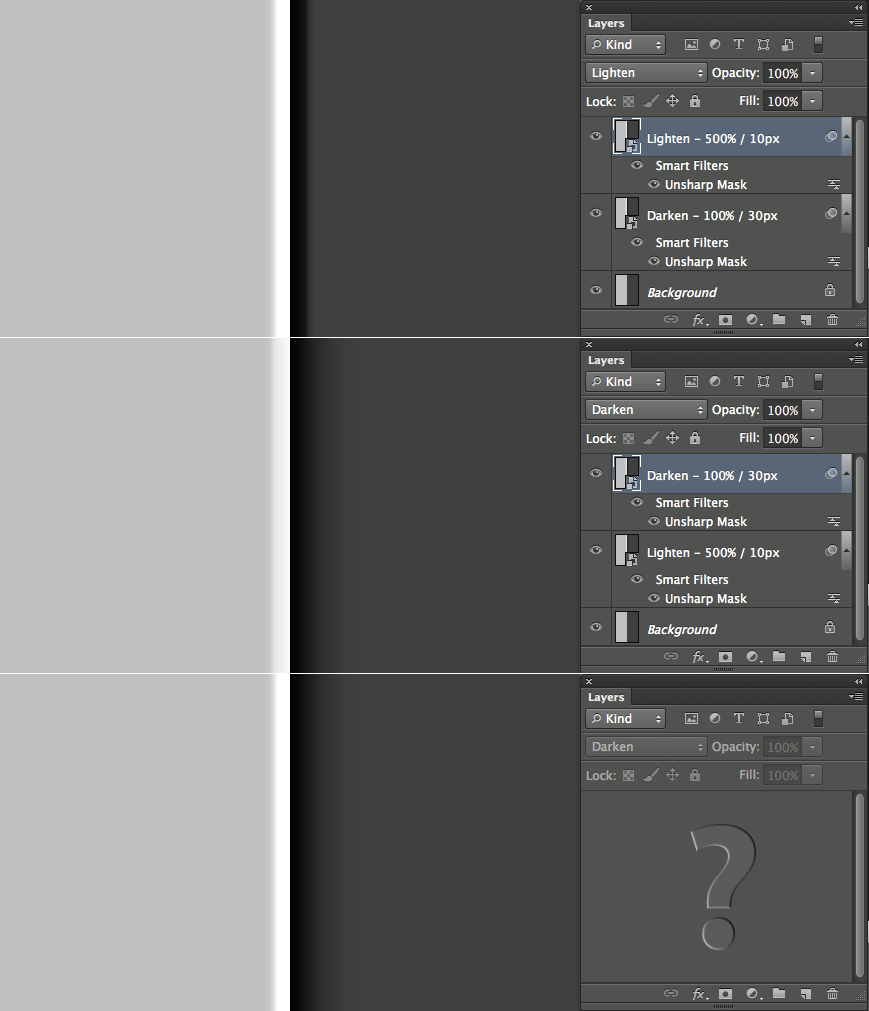
First row (Lighten on top) is obviously flawed because it erases the Darken effect – the dark halo is wrong. Middle row (Darken on top) is not correct too, because the light halo is slightly darkened by the dark halo: it’s subtle because I’ve used a low Amount. Check out the last row to compare them with the right effect. Back to square one.
Multiple Smart Filters
A single SO can support more than one SF (how many, frankly I don’t know). A nice idea could be to apply two rounds of USM as SF to the same SO, fading them to Darken / Lighten. To fade a SF, click on the “lines-and-arrows” icon at the right of the “Unsharp Mask” label of the Smart Filter.
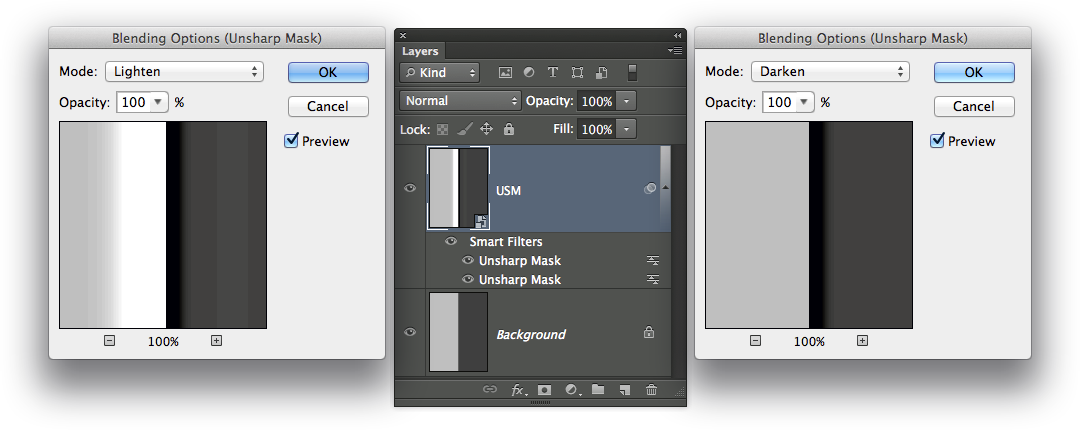
There’s a detail that prevent this one to work, though. SFs don’t operate in parallel, but in sequence: that is, the first USM round acts on the original SO (as expected); the second USM round operates on the result of the first SF, i.e. upon an already sharpened version. No matter how you set the SF stack order (in the following image: first Darken top, second Lighten top), the result is wrong.

So what?
As a consequence of these experiments and in a bad mood for the time wasted coding a flawed paradigm (lesson learned: test extensively! Don’t get excited when things apparently work!), I’ve had to resort to some… trickier solutions – which I’ll show you in the next post of the series.
The Decomposing Sharpening series has been written as a research project for my script DoubleUSM: multi-radius sharpening. You might be interested also in Fixel Detailizer 2PS: multi-frequency contrast booster.