 One of the most interesting yet obvious features of iBooks is the possibility to make an image to pop up fullscreen, so that any small illustration may be appreciated as big as the iPad display allows – and even more, zooming in. Alas, there are at least three ways to do this in iBooks Author, each one with its own drawbacks: because fullscreen and borderless aren’t synonyms.
Images
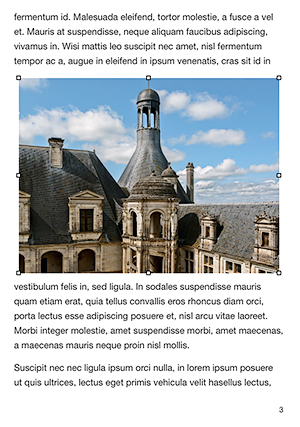
You’ve probably noticed that there’s no menu item for Insert – Image. You’re allowed to drag and drop a JPG or PNG (if the transparency matters to you) either from the Finder or the Media panel, or Choose… one (Command Shift V). Just like in Pages, you can resize it, move it, etc. Yet the picture won’t allow any kind of zoom/pinch: it will be a static image, merged within the background, when exported to the iPad. Users may tap or double tap on it without any effect. In order to add interactivity, the image has to be turned into a Widget.
Image Widget
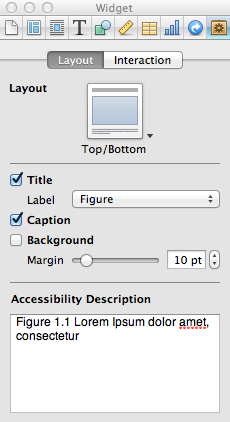 Back in iBooks Author, select your image and open the Widget tab in the Inspector (if the Inspector is not visible as a floating palette, click on the white “i” on the blue circle icon, which is in the Toolbar).
Check either the Title or the Caption checkbox (or both) to transform the Image into an Image Widget. If you are willing to, you may Label the Title via its own drop-down menu and choose from a long list the right definition (Diagram, Figure, Gallery, Illustration, Image, Interactive, Movie, Review), enabling the automatic numbering (Fig 1.1 for instance).
If you’re not interesting in having a Title or a Caption, just delete the text in the editor and leave them blank. Mind you, the Label isn’t related to the kind of widget (you may have an Image Widget labeled Movie and everything will be ok anyway)
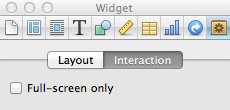
The Interaction tab (just besides the Layout one) shows a promising Full-screen only checkbox. Each and every tutorial or post I’ve read suggest you to check it: do it, it makes no difference at all. Actually I’ve not understood what is it for, since it appears to have no effect in the exported iBook.
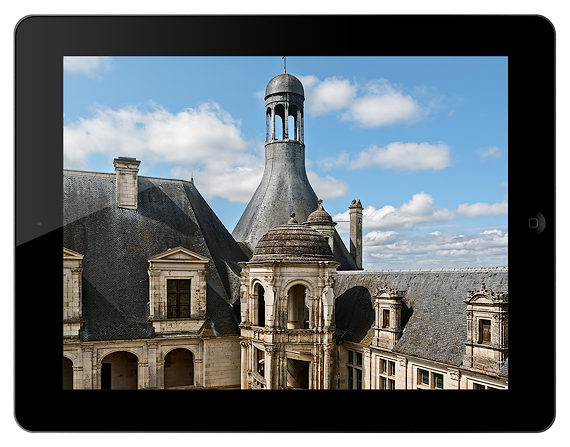
On the iPad the image will pop up fullscreen when double-tapped:
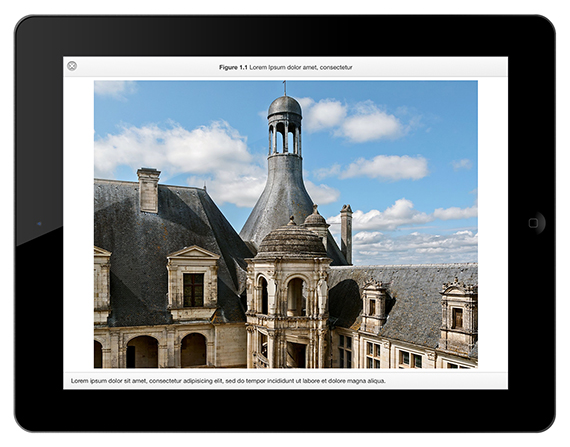
Yet, you see that while the image is fullscreen, it’s not borderless. Actually, if for some reason you don’t want your image to be rescaled in any way, the maximum dimension it will have when displayed fullscreen are 2008 x 1319 px. A border of 20 px each side is always kept, and the image is put on a white background. I haven’t found a way to change its color yet.
Gallery widget
An actual fullscreen image can be obtained via the Gallery widget. Click on the Widget button on the toolbar and select Gallery, or from the menu Insert – Widget – Gallery. It’s a collection of pictures with one placeholder within the text (thumbnails for the other images are optional), that you can swipe with one finger either normal size or fullscreen. Images share the same title, while customized captions are optional. Sounds great right? You may build a Gallery with one image only, this is how it looks like (a true borderless fullscreen!)
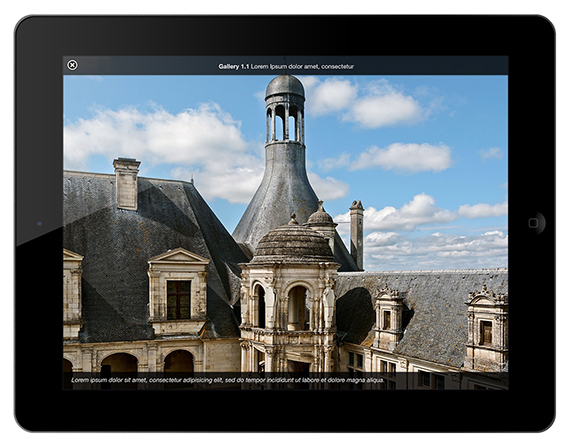
One tap on the image and both Title and Caption will disappear. So what’s wrong with the Gallery widget?
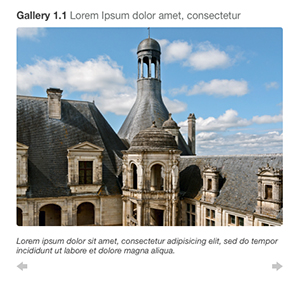 Not the fact that the title is Gallery even if it contains just one image (it can be changed via the Label drop-down menu). The screenshot at the left is from iBooks Author, and shows two grayed out arrows that are for navigating the pictures.
They don’t appear on the iPad if the Gallery contains a single image, yet the whole widget ends up having a wasted, empty, extra white space at the bottom that ruins the overall look of the page. At least to me, and I’ve got to live with me.
So far, this is the best solution to display a borderless fullscreen image with optional title and caption, but with one design drawback on the book page.
Interactive Image widget
This one is for zooming the image into predefined hot-spots, that usually contains textual captions: just like you can build an Gallery with a single image, you’re allowed to add an Interactive Image widget without any extra view or hot-spot. So add the widget and delete the views in the Widget tab of the Inspector panel. This is the fullscreen outcome:
It shows no title and no caption – that may be useful to have.
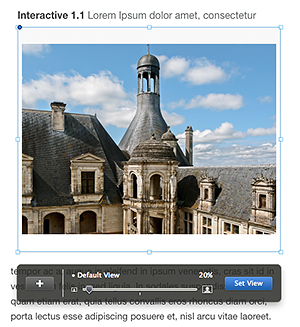
Yet the biggest issue to me is that, in iBooks Author, it’s almost impossible to make the small image to fit the widget’s box (tweaking the zoom), avoiding the ugly white bar to appear above and below the image. With the same picture I’ve been able to do it successfully once, then in order to grab a screenshot for this blogpost, there’s no way I could do it again. As a suggestion, remember to click the blue Set View button, otherwise the widget will zoom the image back to its default value.
I’ve been playing with iBooks Author for few days, and I admit it’s a beautiful piece of software, being at the version 1.1. It has a lot of bugs: the most annoying one, in my opinion, is the broken media placeholder (UPDATE: in order to successfully transform a picture/movie within a master page into a placeholder you must select it, then 1) Format – Advanced – Define as Media Placeholder. 2) From the Inspector panel, select the Layout inspector and below Layout Object select the Editable on pages using this layout checkbox. If you forget this checkbox, the placeholder won’t work).
I hope future releases will fix the issues, and above all, I hope we’ll see point updates to appear frequently – for iBooks Author is truly an amazing software!
[The image is courtesy Roberto Bigano]