 “Save As” is the very first, basic, form of Version Control – the business of tracking and/or reverting the changes you made to (code, images, files) over time. You know:
- BlogPost.txt
- BlogPost_V1.txt
- BlogPost_V2_Links.txt
- BlogPost_Final.txt
- BlogPost_Final_OK.txt
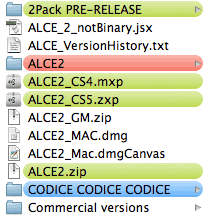
Etc. The image at the right is a screenshot of my actual ALCE development main folder, so I’ve decided to adopt some kind of Version Control, namely: Subclipse (a Subversion support provider plugin) for Flash Builder 4.6.
Since I’m still learning, I will show here my findings from the point of view of a single developer, hoping that this first post (about Installation and setup of a local repository) will save some time to those who, like me, are beginning to put some order to the chaos.
Subversion and Subclipse
First if you’re new to the topic (as I am), please have a look to this well done and super clear Visual Guide to Version Control System (VCS). It explains the concept of revision control and its terminology.
Basically, in the centralized (and not distributed) paradigm you set a Repository: i.e. a folder (either local or on a remote server) that contains a reference copy of your code. You Check Out (download it) on your machine in order to be able to edit/change it; you Synchronize with the Repository and then Commit (or Check In, i.e. upload) the changes. The system keeps track of the changes (as a sum of differences), sets revision numbers, can backup and restore; moreover, you may Branch the code – that is: duplicate the Trunk to experiment new implementations – and eventually Merge them back on the main line. Plus a whole bunch of advanced features that I don’t understand yet.
A very common Version Control System is Subversion, also known as svn (the command line tool). If you wanna hear bad bad things about Subversion, Linus Torvalds is a great source. And if you wonder why choose Subclipse and not Subversive as an Eclipse (and Flash Builder) plugin, there’s a Q&A worth reading here.
Installation
In Flash Builder (I use 4.6 but afaik the same applies for 4.5 and 4.0), go to the menu:
Help – Eclipse Marketplace
and in the following window search for “Subclipse”:
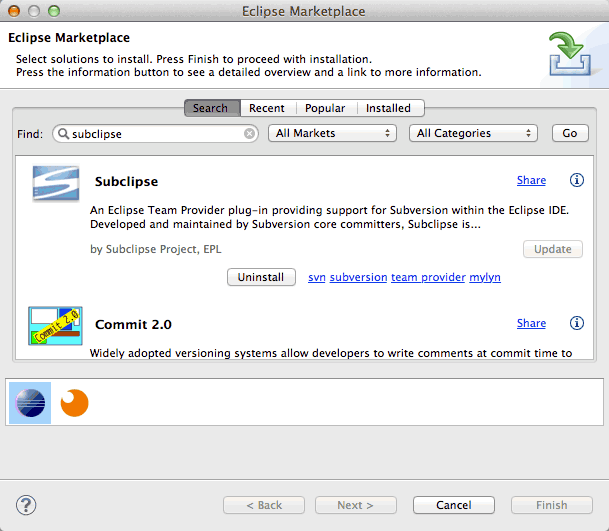
Click the Install button and restart Flash Builder. It seems enough to consider Subclipse installed.
Setup of a Local Repository
Many of the tutorials I’ve read at this point show you how to setup a repo (we know the lingo now ;-)) on a remote server. Thanks, but I don’t collaborate with people who are in need to sync, and I don’t even know how to setup a remote server to put my small repo into. I just need a folder on my local disk. After a couple of unsuccessful tries (one of which involved MAMP), I’ve understood that the process is:
- Locate a folder and tell svn (not Subclipse: svn, the command line tool) to create a new repository.
- Point Subclipse to it.
It makes sense – but if you’re new to Version Control Systems you’d stare at Flash Builder (as I did) thinking: how on earth I’m supposed to do it?
Create a repository
First, Subclipse cannot create a repository.
Let’s say that I want my “repo” folder (that will contain repositories) to be in my Home – I’ll use Finder to create that “repo” new folder as I would do for any other folder I need. Then, I must open the Terminal:
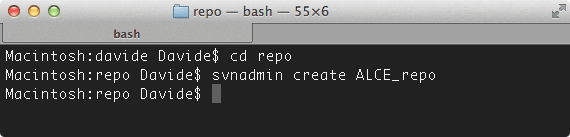
And type a couple of commands:
cd repo
This first line is to enter into the “repo” folder I’ve just created in Finder.
svnadmin create ALCE_repo
This second line tells svn (the command line tool) to create, within the “repo” folder, an actual repository called “ALCE_repo” (that will contain my ALCE project).
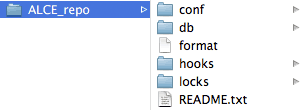
This is what a repository looks like
That is: “repo” will contain as many different repositories as the projects I need to take control of. If you look at the command’s output, you’ll see several new files.
Fill a repository with things
We now have a brand new repo: the second step is to fill it with a Flash Builder project (either a CS extension, or any other Flash/AIR thing you’re coding).
SVN Perspective
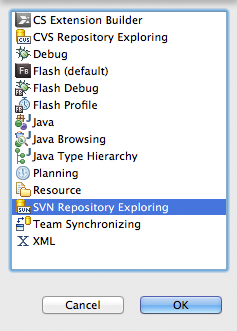
In Flash Builder, from the menu Window – Open Perspective – Other… browse to SVN Repository Exploring.
This perspective gives you access to the SVN Repositories panel, which should be empty. To make Flash Builder aware that a repository exists, right click inside the panel and select New – Repository Location… then in the following window, please enter:
file:///Users/[your user]/repo/ALCE_repo
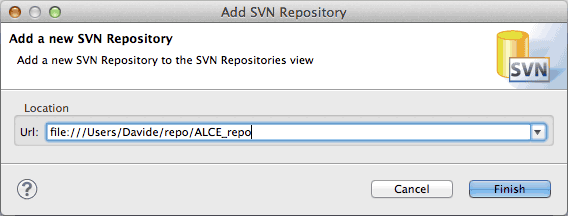
Please notice that “file:///” has a triple forward slash.
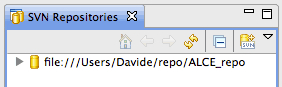
A new location should be now set, as you see in the screenshot on the right – that is: Flash Builder knows about a repository location.
 The next and final step is to link a project to this repo.
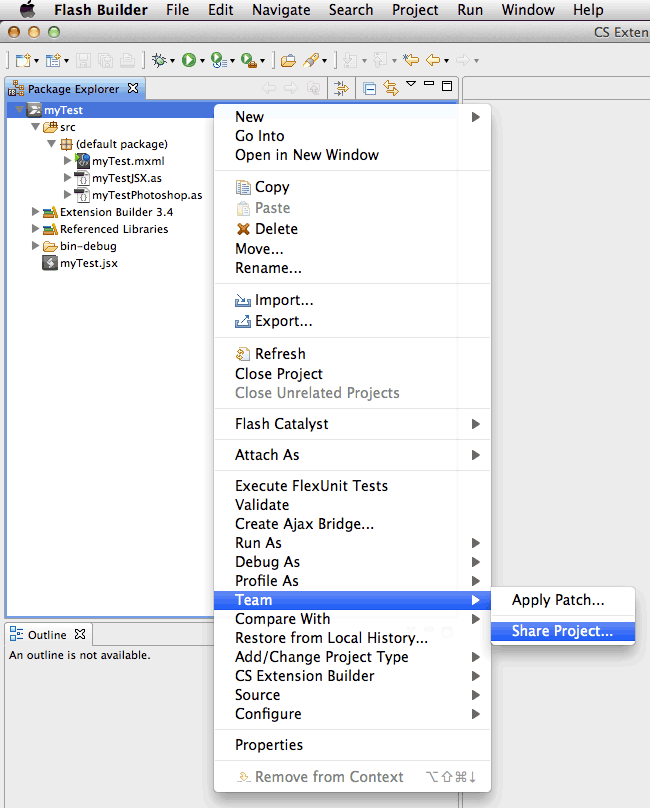
The Subclipse commands in the Flash Builder IDE belongs to a menu item called Team. To access it, switch back to your usual Flex or Extension Builder perspective, in the Package Explorer panel right click on the project you want to add to the repository, then select:
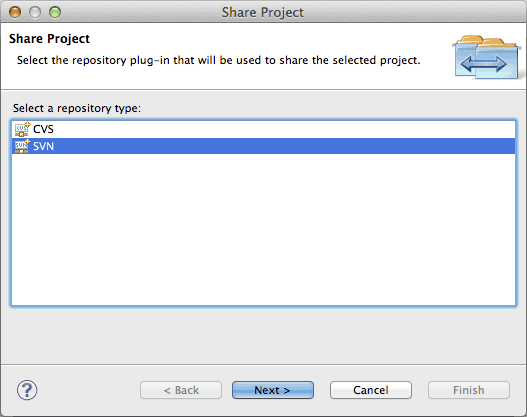
Team – Share
In the following window select SVN as the repository type:
then Use existing repository location:
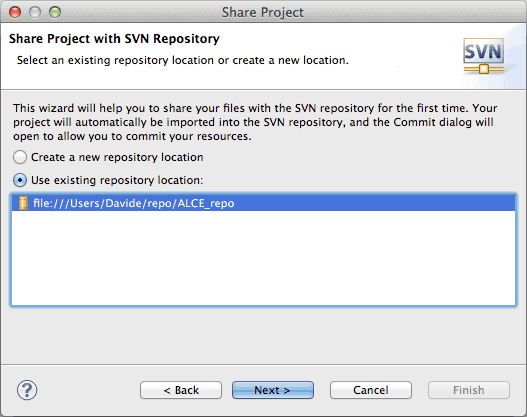
and finally Use project name as folder name:

Mind you, the Console will report a red warning saying that:
Filesystem has no item svn: URL 'file:///Users/Davide/repo/ALCE_repo/myTest' non-existent in that revision
Which you can safely ignore (the following command, mkdir, creates the missing myTest folder). According to the documentation, now the whole project should be committed – that is: all the files copied to the repository.
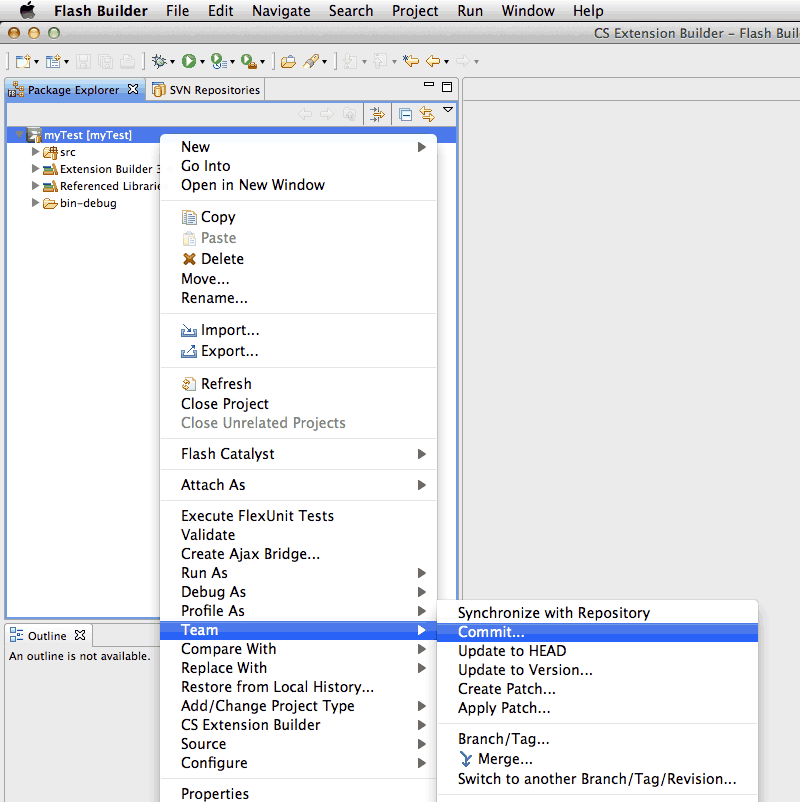 To me, this doesn’t happen, so I’ve to do it manually; right click on the project (myTest in this case, see the screenshot on the right) in the Package Explorer panel and choose:
Team – Commit
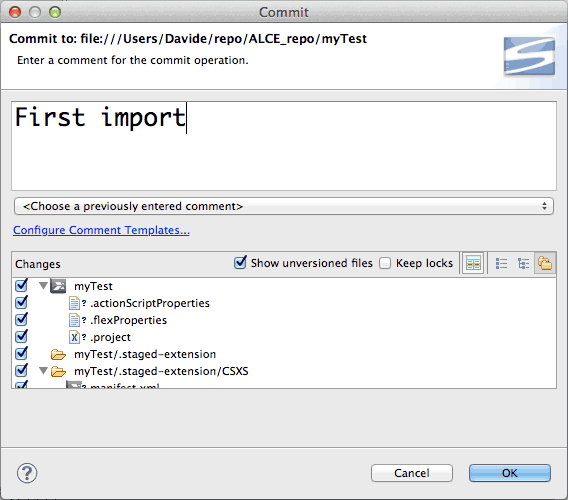
In the window that will pop up, you’re able to select which resource send to the repository – setting a custom comment too:
That’s all! To check that everything went fine, you should notice several log messages in the console.
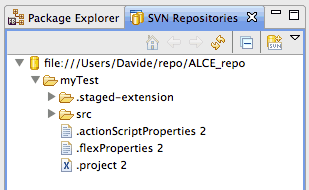 Also, go to the SVN repositories panel and click the refresh button (the two yellow arrows) in order to display the changes. The repository now contains the myTest folder and all the project files.
Now that the binding is done, you can start using the Version Control System – that is, code freely and Commit each time you want to set a new revision; revisions can be found later in the History panel.
I hope this summary has been of some help for you. In the next post of this series, I’ll try to dig a little bit deeper (I’m still learning!) around Tags, Branches, revisions, etc. so stay tuned!
Useful links
I’ve collected a good amount of links while writing this post. Some of them may help you too:
- Version Control with Subversion, pdf version of the Subversion manual (also published by O’Reilly).
- Guy Rutemberg on Creating Local SVN Repository (with svn command line tools).
- IBM howto about Subversion and Eclipse.
- North Carolina State University on Subclipse for Configuration Management.